
Chapter 16 · 16.8
Creating a fillable Word form with everything else locked
A registration form, intake form or order form that people fill in using Word or Euro-Office: only the fields should change, not the fixed text. In Creating a PDF form you can read how to create a fillable PDF form. This article covers the docx version, which also works in Microsoft Word. Euro-Office calls the fields Content Controls (Word uses the same name).
As an example, we'll create the registration form for the Christmas arrangement workshop at Bloemisterij Het Zonnetje.
Step 1: the fixed text
First, type the whole form: the title, the explanation and the questions, such as "Name:", "Workshop date:" and "Number of people:". Leave room after each question for the answer.
Step 2: inserting the fields
- Place the cursor after "Name:".
- Go to the Insert tab and click the arrow next to Content Controls (the icon on the far right).
- Choose the type of field (see the table).
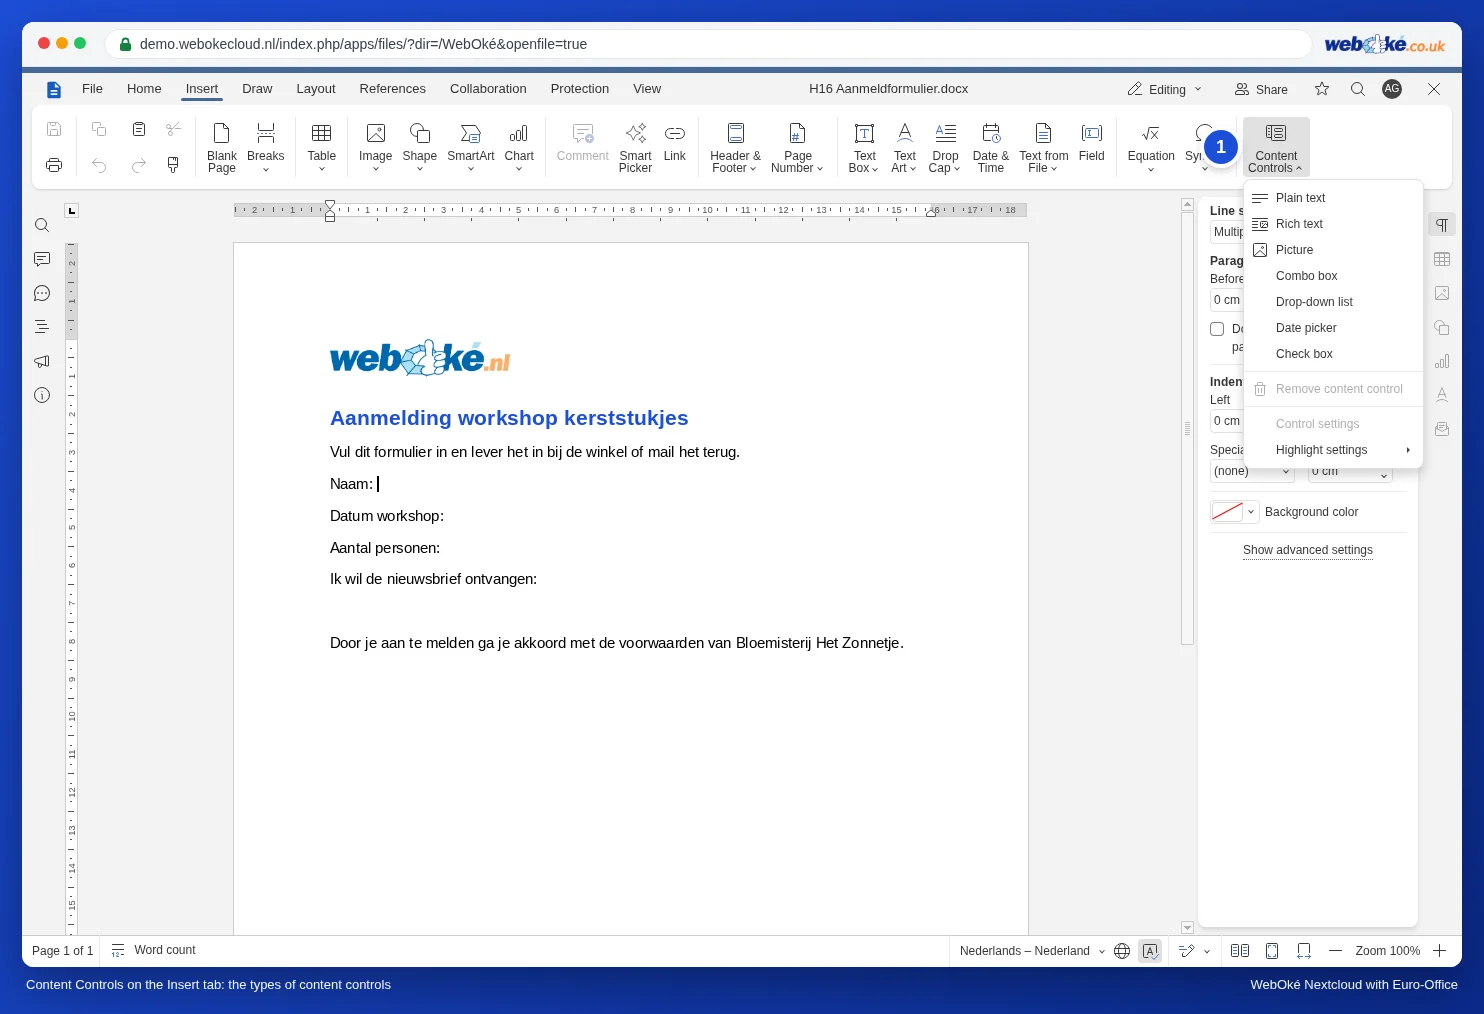
| Option | What it is | Example |
|---|---|---|
| Plain text | A piece of text, without formatting. | Name, town |
| Rich text | Text with formatting, including multiple paragraphs. | Explanation, comments |
| Picture | A box for a photo. | Passport photo, logo |
| Combo box | A list of options where you can also type something else. | Number of people |
| Drop-down list | A list where you can only pick one of the options. | Yes / No |
| Date | A field with a small calendar. | Workshop date |
| Check box | A box to tick. | Agree to the terms and conditions |
Please note: don't mix up the two lists. A Combo box also accepts your own text, while a Drop-down list only lets you pick one of the fixed options. We checked this in the demo.
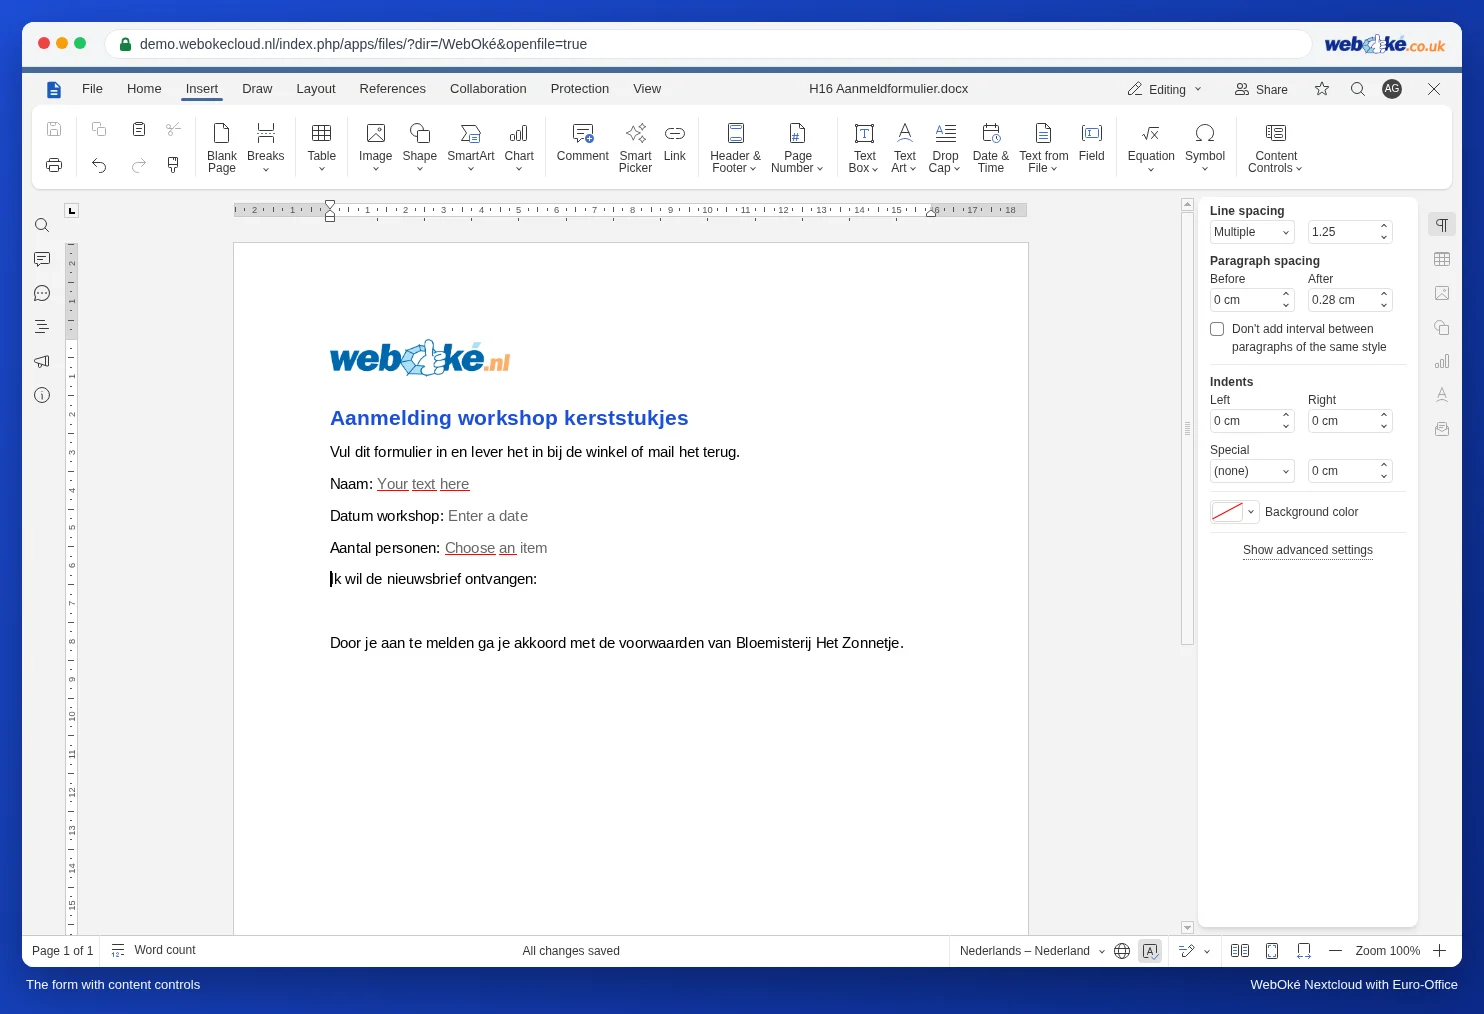
The form now shows grey text such as "Your text here", "Enter a date" and "Choose an item". This placeholder text disappears as soon as someone fills in the field.
Step 3: adding options and instructions
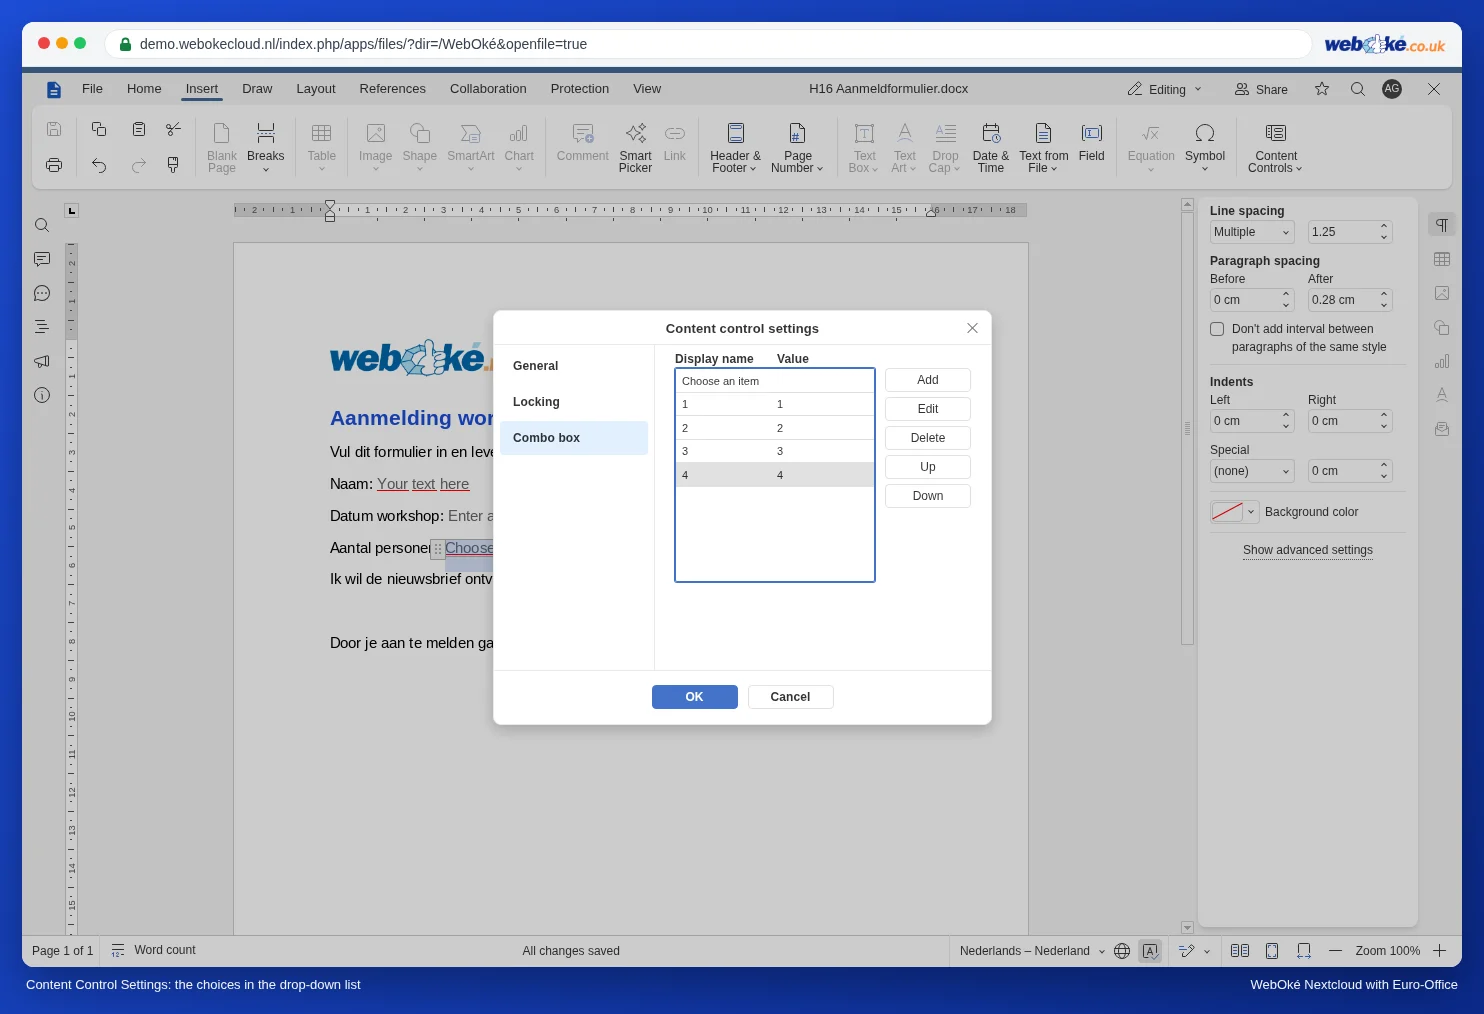
- Click in a field and under Content Controls choose Control settings.
- On the General tab, enter a Title and, if you like, your own Placeholder, such as "Type your name here".
- For a list, go to the Combo box tab. Click Add for each option (for example 1, 2, 3 and 4 people). Use Move up and Down to put them in the right order.
- On the Locking tab, switch on Content control cannot be deleted, so nobody removes the field by accident.
Step 4: locking everything else
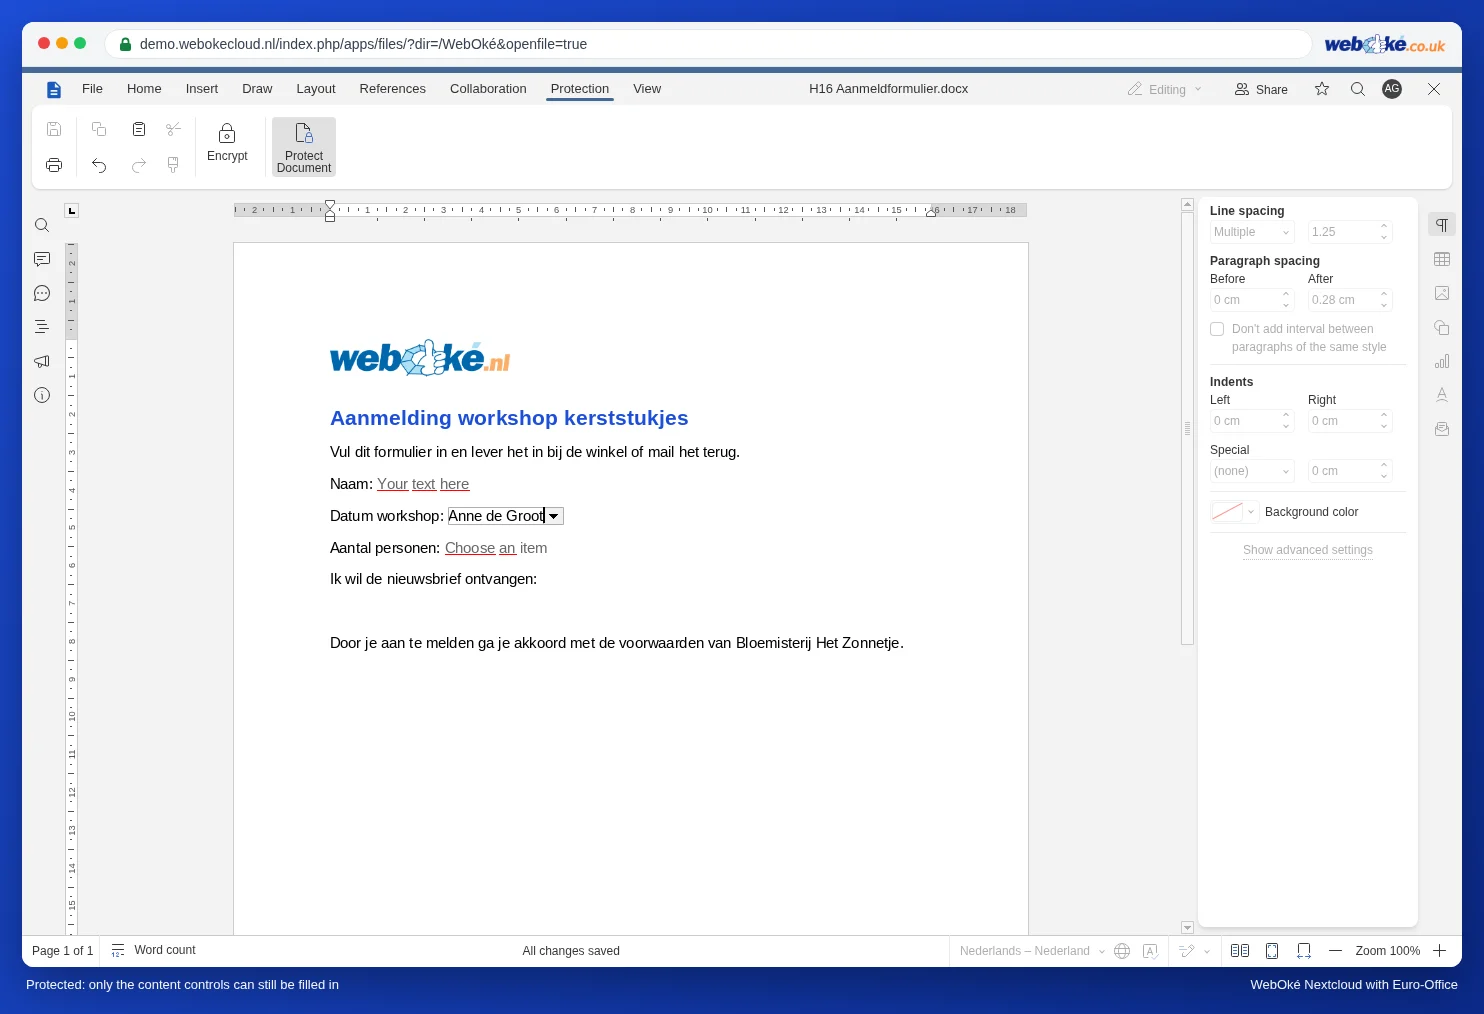
- Go to the Protection tab and click Protect Document.
- Choose Filling forms, enter a password if you want and click Protect.
Now people can only type and choose in the fields. If they try to change the fixed text, nothing happens: in the demo, the cursor jumped to the next field automatically. More about protection: Protect a document: read only, comments only or tracked changes only.
Testing and sending
- Open the form as a colleague (or ask a colleague to open it) and fill it in. Check that all the options are correct.
- Share the form as a file or via a link (see Creating a public link (view or edit)). The recipient can fill it in using Euro-Office; because it's an ordinary docx file, it should also work in Word. Give that a quick test if your recipients use Word.
- Have everyone fill in their own copy, not the same shared file. Otherwise people will overwrite each other's answers. You can read how to arrange this in Sharing a form so everyone fills in their own copy.
Pitfalls
- We haven't found a way in Euro-Office to mark loose pieces of text as an "editable region", as you can in Word. So turn everything that needs filling in into a field.
- Do you need required fields, a signature or a form for people without Word? Then create a PDF form (Creating a PDF form).
- A forgotten password can't be recovered. It's best not to use a password for a form: the protection is meant to prevent mistakes.