
Chapter 18 · 18.1
Creating your own house style template: slide master, layouts and placeholders
Putting your logo on every slide is one thing (see Adding the logo to all slides at once). A real house style template goes further: fixed fonts and colours, your own layouts such as "Text with photo" or "Two Columns", and boxes where colleagues only need to click and type. Everyone then makes presentations that look the same, without anyone having to move things around.
As an example, we'll create the template for Bloemisterij Het Zonnetje, a WebOké customer. Florist Sanne wants her staff to use the same design for every workshop and every season.
How the slide master is structured
- The master slide is the top, largest slide in the slide master. What you set here (font, colour, logo, background) applies to all the layouts below it.
- The layouts are the smaller slides below it. Each layout is a fixed arrangement of boxes, for example Title Slide or Title and object. When you add a new slide, you choose one of these layouts.
- Placeholders are the dotted boxes on a layout. On the slide itself they contain a prompt, such as "Click to add text". When someone types in one, the text automatically gets the template's formatting.
Tip: start with a new, blank presentation (New, New presentation in your files, see Creating a new document, spreadsheet or presentation). It already has eleven standard layouts. A presentation you receive from someone else often has only one or two layouts.
Step 1: open the slide master
- Open the new presentation and go to the View tab.
- Click Slide Master. A Slide Master tab appears, and on the left you see the master slide with the layouts below it.
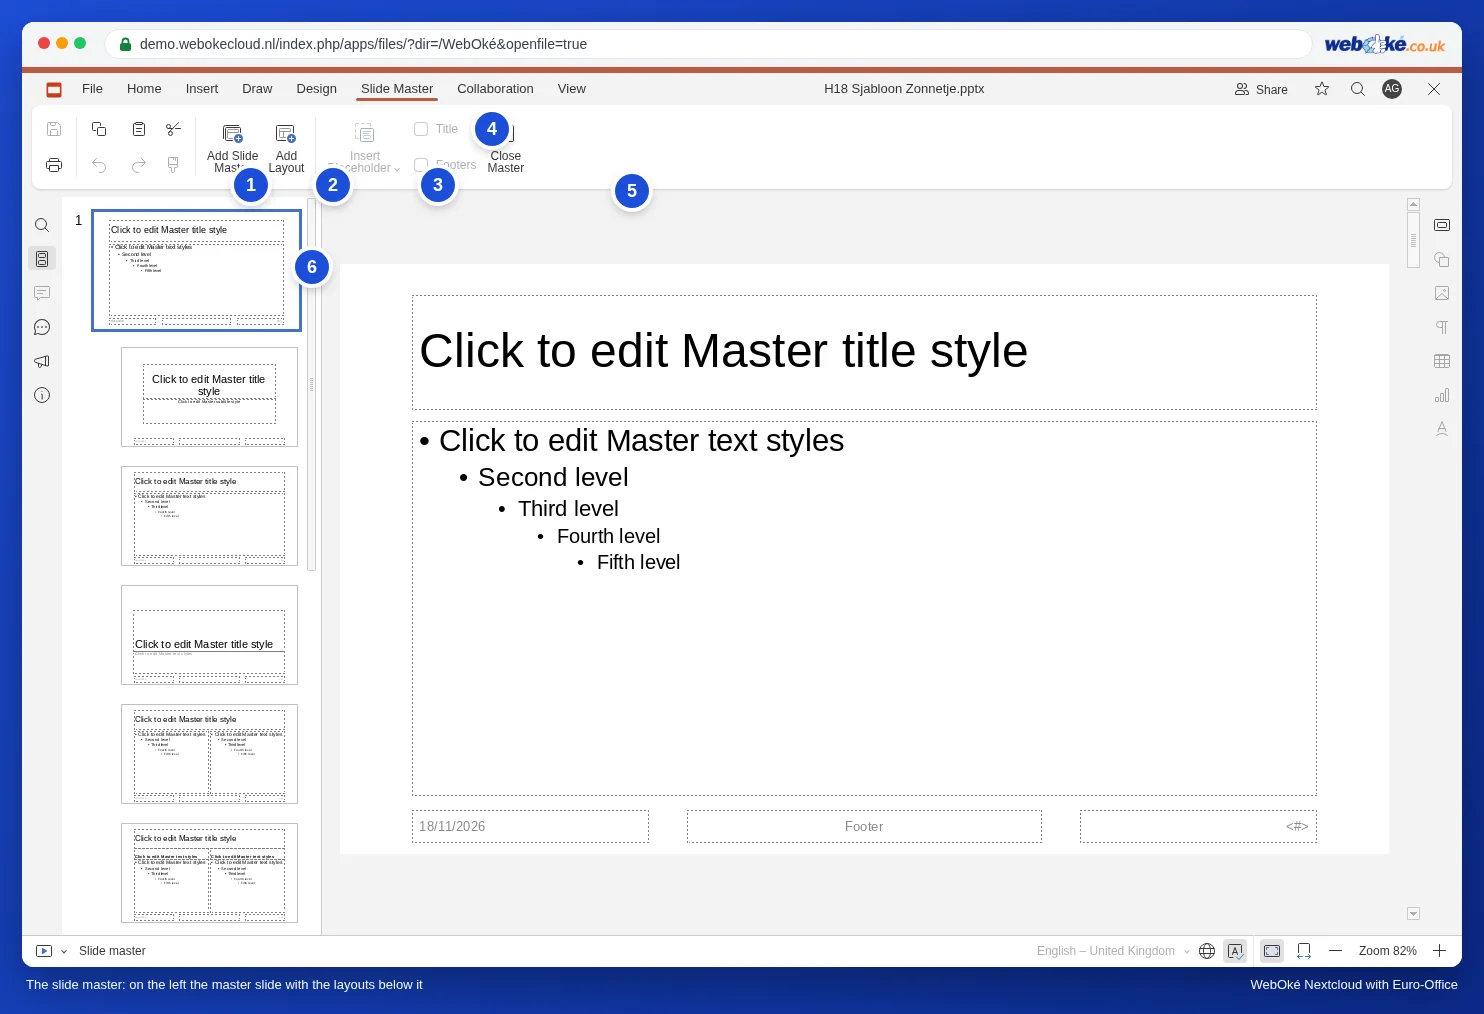
While the slide master is open, the Transitions and Animation tabs are hidden and the status bar at the bottom left shows Slide master. That way you always know which mode you're working in.
Step 2: font, colours and logo on the master slide
- On the left, click the top, largest slide: the master slide.
- Click the border of the title box ("Click to edit Master title style") so the whole box is selected. On the Home tab, choose the font, size and colour for all titles. Do the same with the text box below it for the body text.
- On the Design tab, choose your house style colours under Colors. These colours appear at the top of every colour picker as theme colours.
- Add your logo to the master slide with Insert, Image (see Adding the logo to all slides at once).
Please note: choose a font from the Euro-Office list. If you type a name that isn't on the list yourself, for example the font from your printed materials, Euro-Office warns you that the font isn't available and shows the text in a substitute font. See A PowerPoint with custom fonts: text that shifts or runs over the edge.
Step 3: remove layouts you don't need
Eleven layouts is too many for most businesses. The less choice, the more consistency.
- Right-click a layout you don't use, for example Vertical title and text.
- Choose Delete Layout.
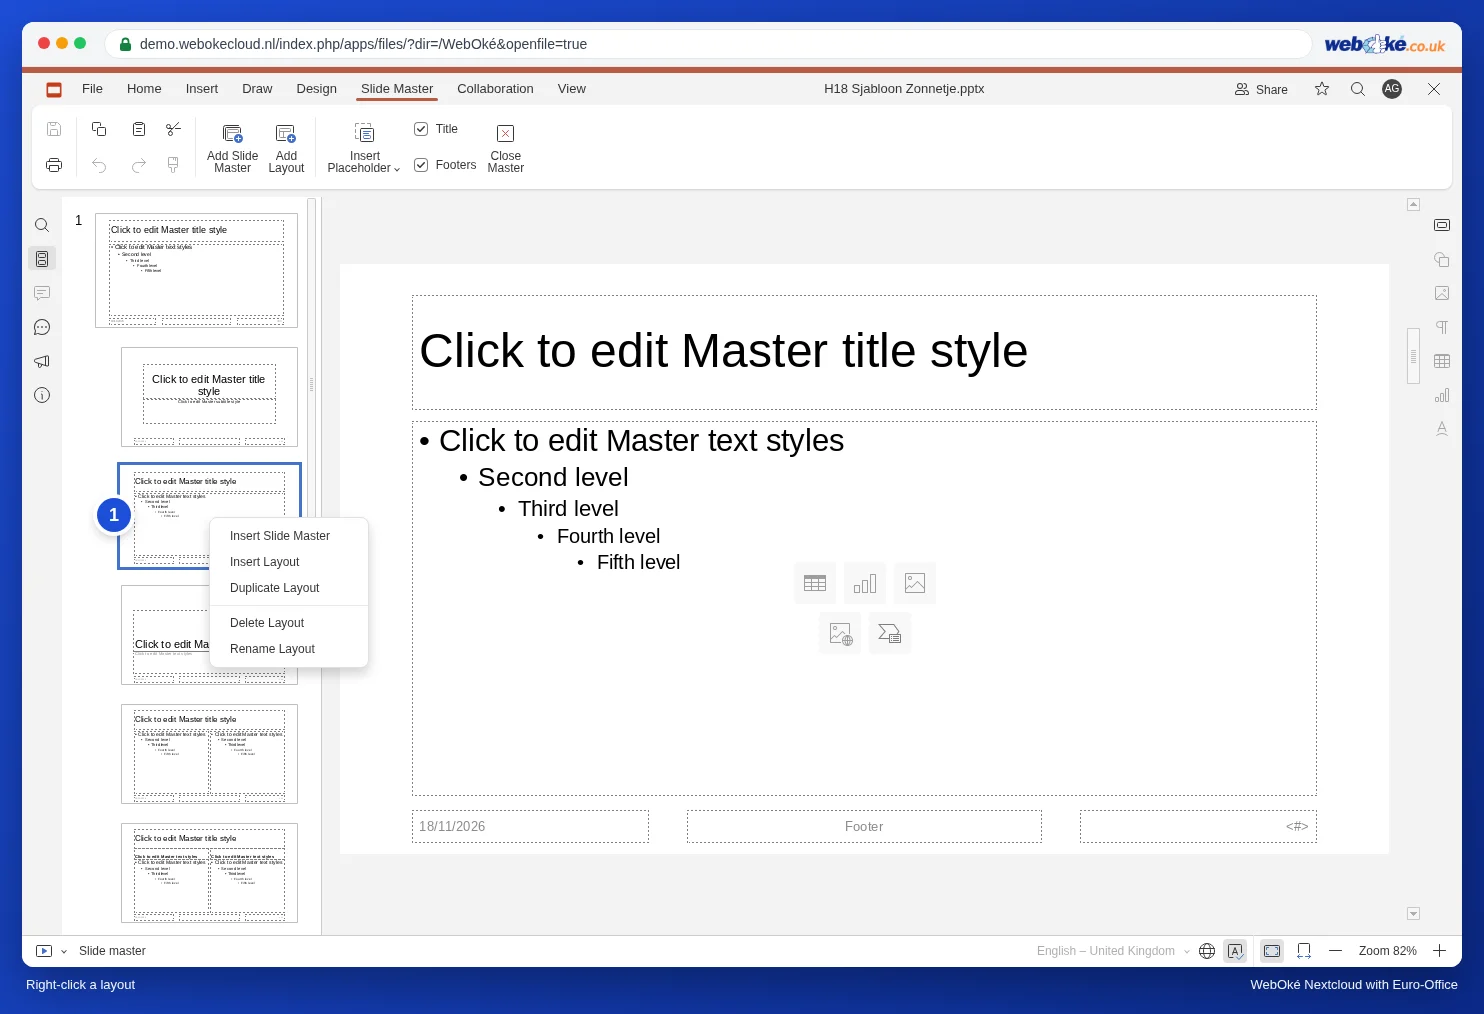
Is Delete Layout greyed out? Then a slide in the presentation still uses that layout. Give that slide a different layout first.
Step 4: your own layout with a photo box
Sanne wants a layout with text on the left and a photo on the right, for each bouquet in the collection.
- Right-click the Title and object layout (the third slide in the list on the left) and choose Duplicate Layout. That way you start with a title, a text box and the footers.
- Make the text box narrower by dragging the handle on the right.
- On the Slide Master tab, click the arrow below Insert Placeholder and choose Picture.
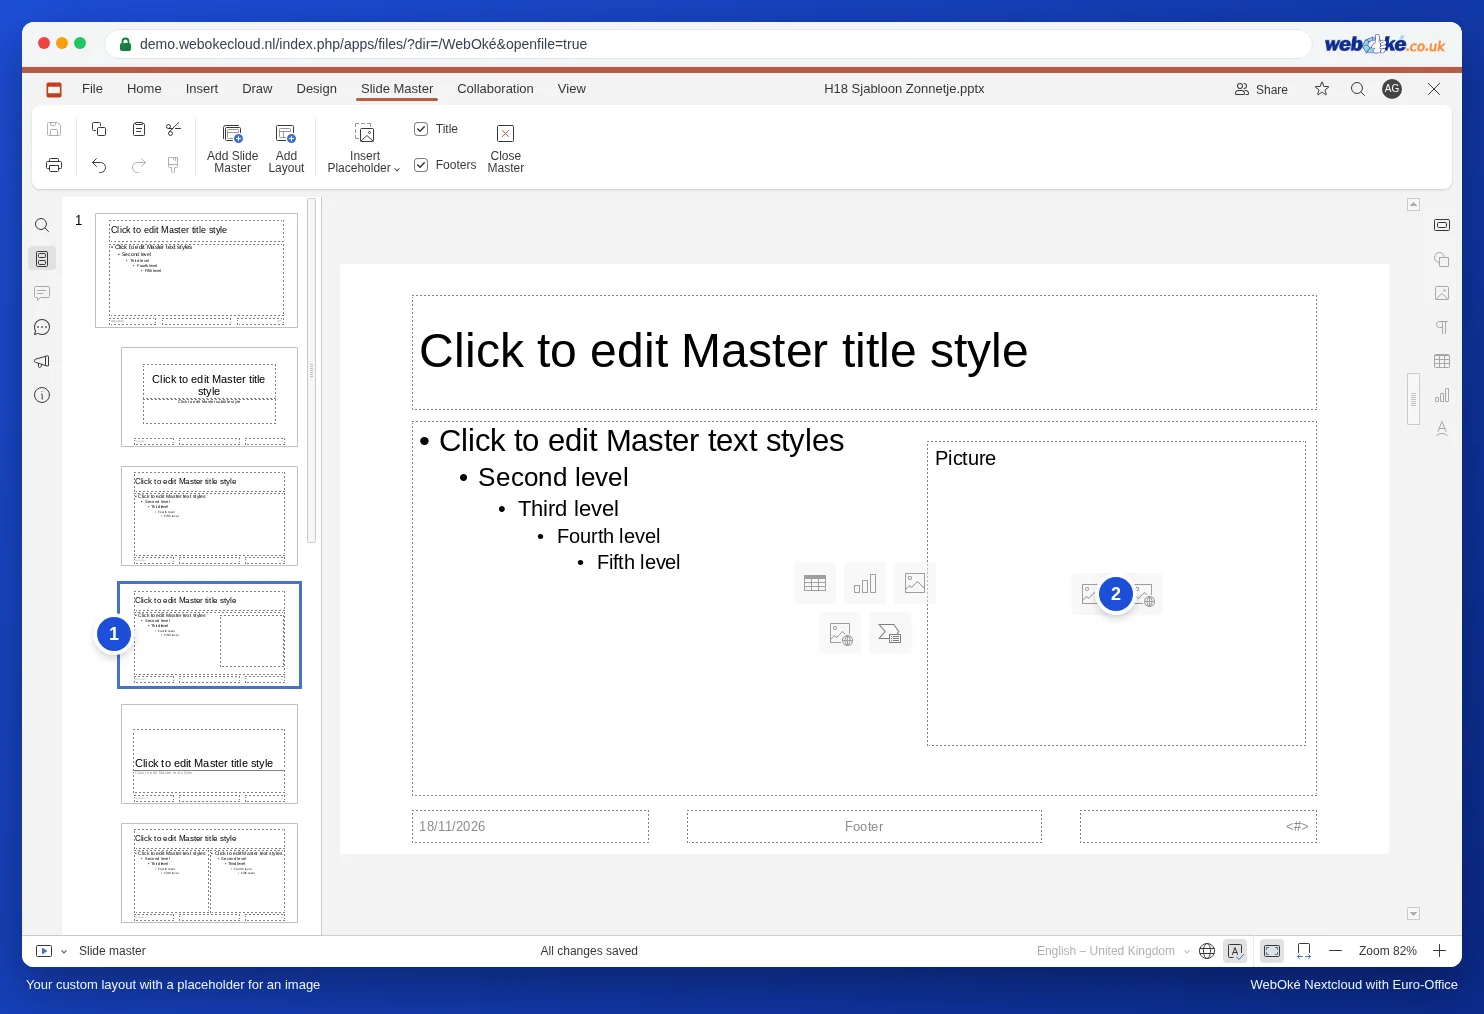
- Draw a box on the right of the slide with your mouse. A dotted box with the word Picture appears.
- Right-click the layout, choose Rename Layout, type Text with photo and click OK.
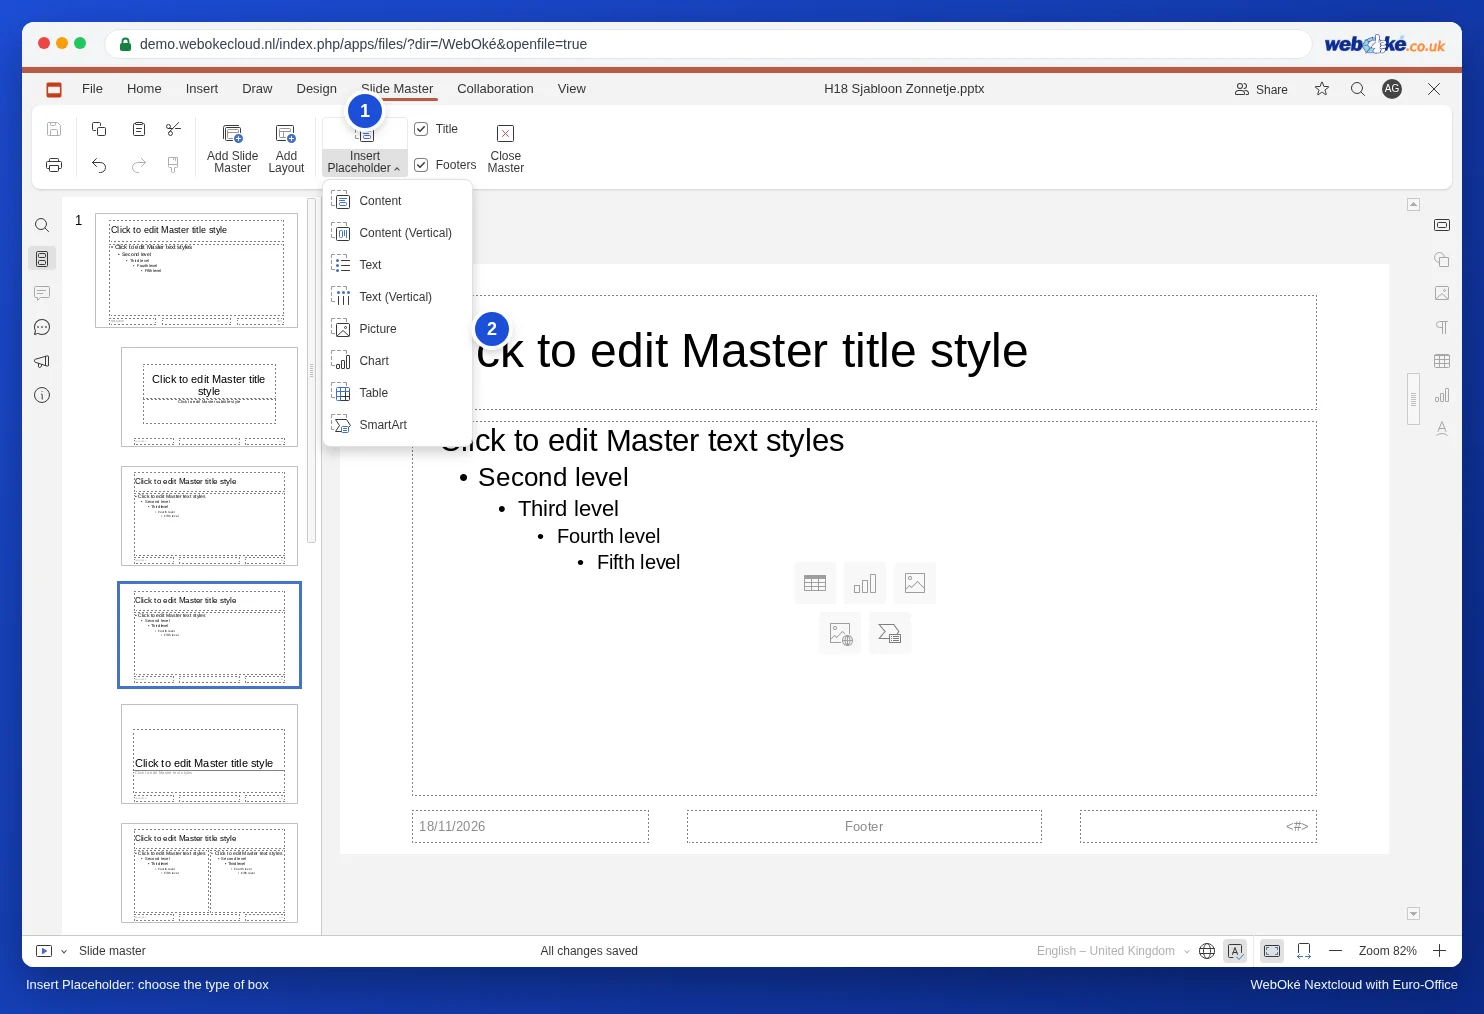
The placeholder types are Content, Content (Vertical), Text, Text (Vertical), Picture, Chart, Table and SmartArt. A Content box is the most flexible: your colleague decides whether it holds text, a table, a chart or a picture.
Don't want a title or footer on a layout? Then untick Title or Footers on the Slide Master tab.
Step 5: close and test
- Click Close Master.
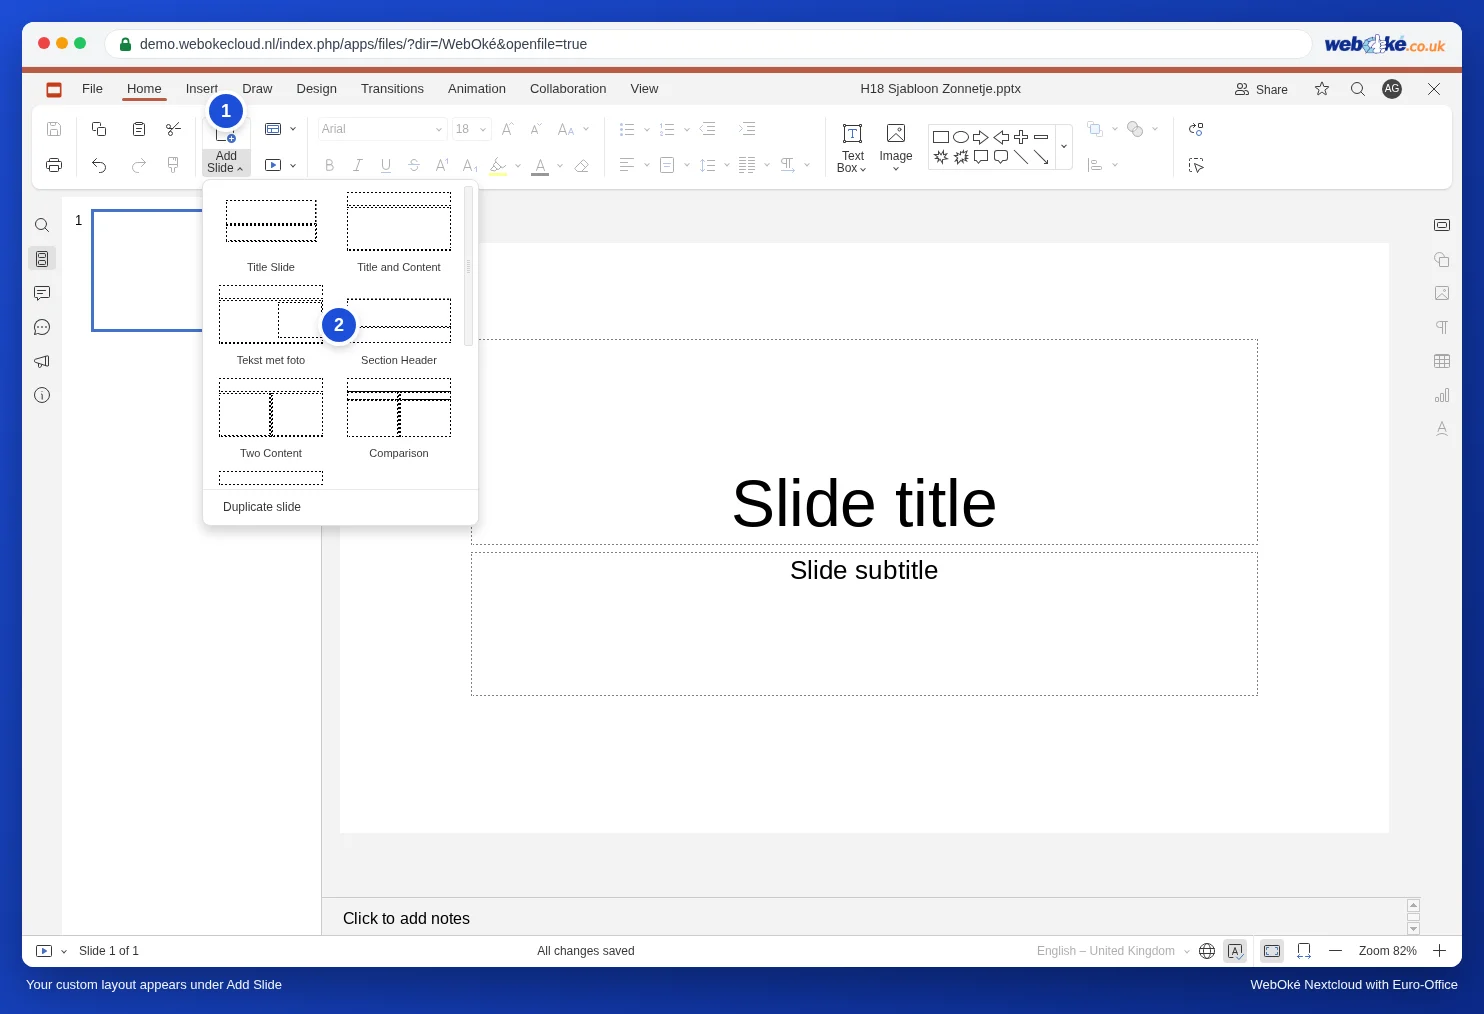
- On the Home tab, click the arrow below Add Slide. Your own Text with photo layout is now in the list.
- Choose it. In the photo box, click the picture icon and choose a photo. It fits exactly in the box, in the spot you defined.
Step 6: save and share the template
You have two options.
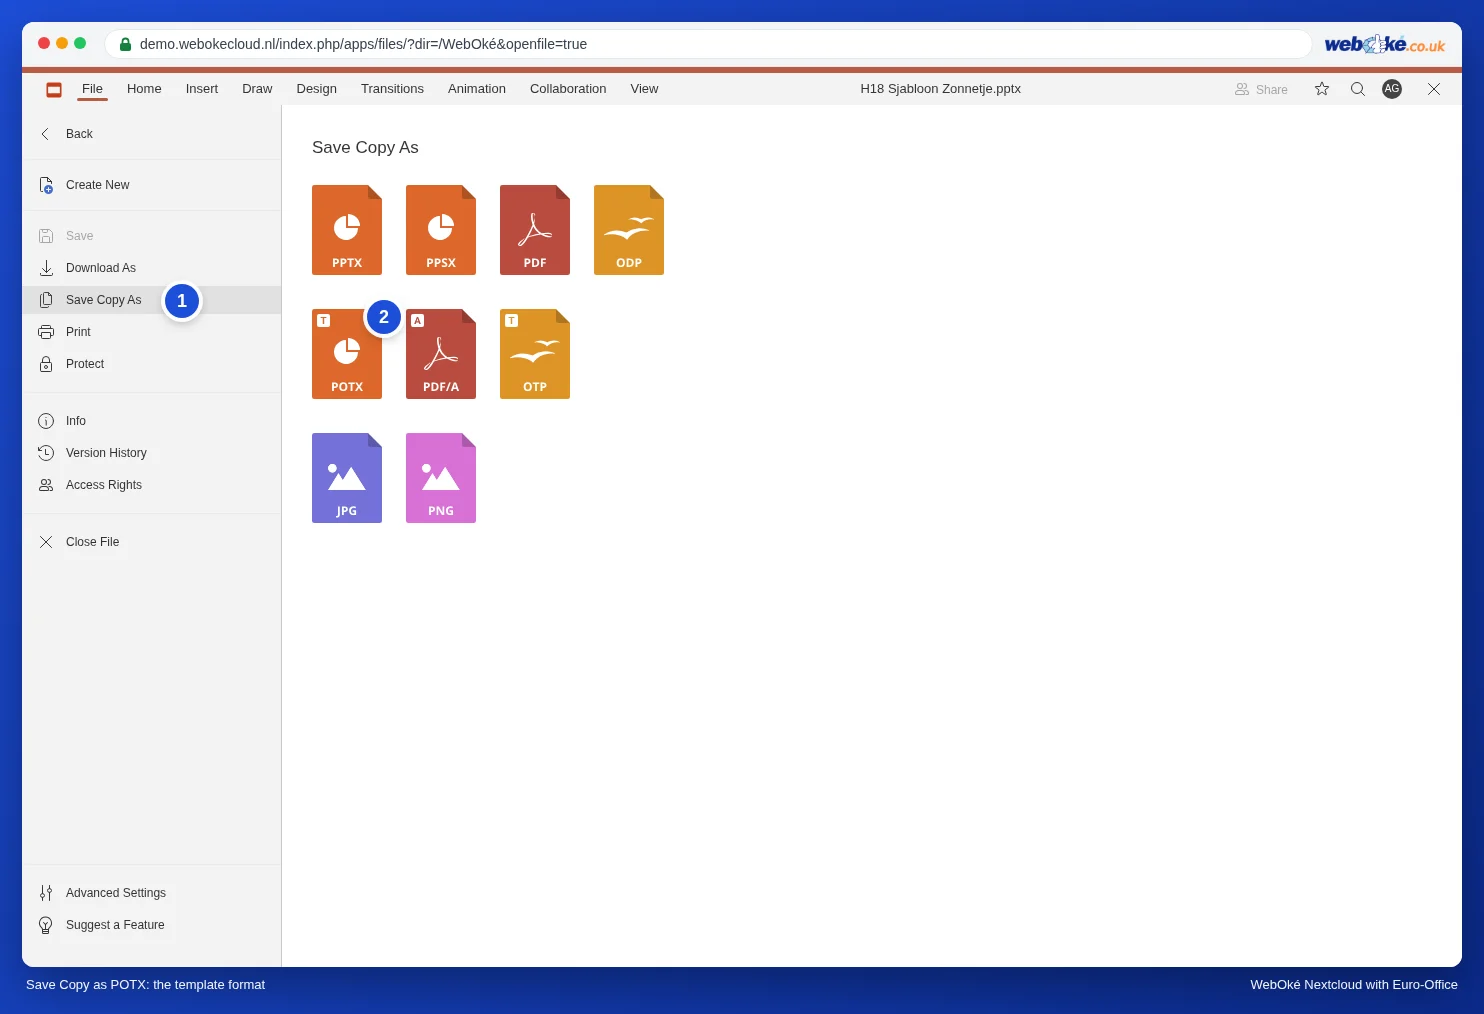
- As a pptx in a shared folder: put the presentation in a folder you share with your colleagues (see Sharing a document with a colleague), for example Templates, and name it "Huisstijl Het Zonnetje". Agree that nobody edits the file itself: open it, immediately choose File, Save Copy As, PPTX, and continue working in that copy. Give colleagues read-only access so the template can't be changed by accident.
- As a PowerPoint template (POTX): choose File, Save Copy As and click POTX. Choose the folder and click the Choose button. With Download as, POTX the template ends up in the Downloads folder on your computer. Someone with PowerPoint can use that file as a design template.
For text documents, a team template works the same way, with a shared folder and Save Copy As: see A house style template for your whole team.
Please note: a potx file doesn't open in Euro-Office in your WebOké Nextcloud. If you click it in your files, Nextcloud downloads it. For your own team, the pptx in a shared folder is therefore the most convenient option; the potx is for people who work with PowerPoint.
Updating existing slides to a changed template
If you change the slide master later, most slides pick up the changes automatically. If someone has changed the formatting on a slide themselves (moved a title, chosen a different font), that difference stays. In that case, right-click the slide on the left and choose Reset slide: the boxes jump back to the position and formatting of the layout. The text stays.
Does a slide have the wrong layout? Right-click the slide and choose Change layout.
Two designs in one template
Do you want a dark version alongside the regular design, for example for presentations on a large screen? In the slide master, click Add Slide Master. A second master slide with its own layouts appears. Give it a name with Rename Master (right-click). The same menu contains Preserve Master: turn it on for a master slide that isn't used by any slide (yet), so it stays in the template.
Pitfalls
- Typing text on the master slide itself: a regular text box on the master slide appears on every slide, but colleagues can't edit it on the slide. Always use placeholders on a layout for content.
- Insert Placeholder is greyed out: you've selected the master slide. Click a layout below it first.
- You don't see Transitions and Animation: you're still in the slide master. Click Close Master.
- Using someone else's presentation as a starting point: it often has only one or two layouts. It's better to start with a new presentation and copy the slides over afterwards.
More about layouts and themes in Layouts and themes; the logo on all slides in Adding the logo to all slides at once; changing a presentation from 4:3 to 16:9 in Converting an old 4:3 presentation to widescreen 16:9.