


In this article we will explain how to create an email address in the DirectAdmin control panel, which can be done in just a few clicks.
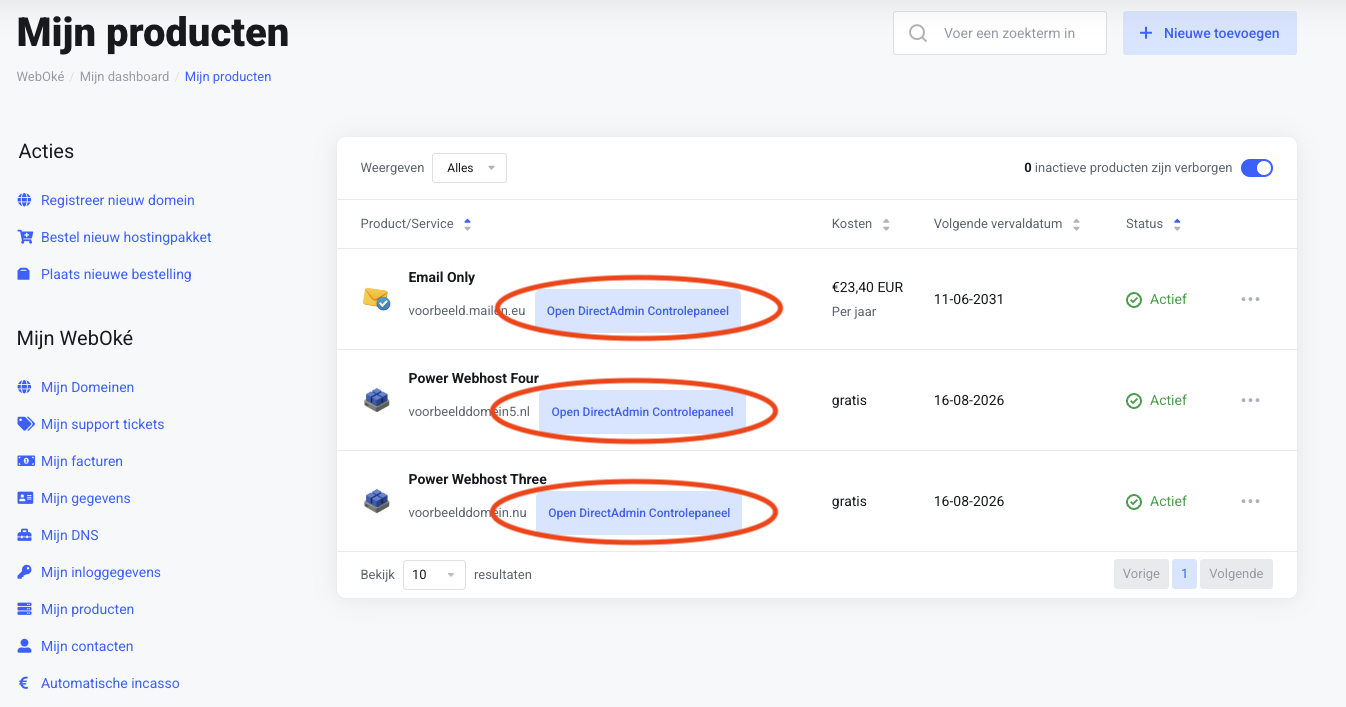
Step 1 - Log into your WebOké account and go to 'My Products'.
Step 2 - Click on 'Open DirectAdmin Control Panel'.
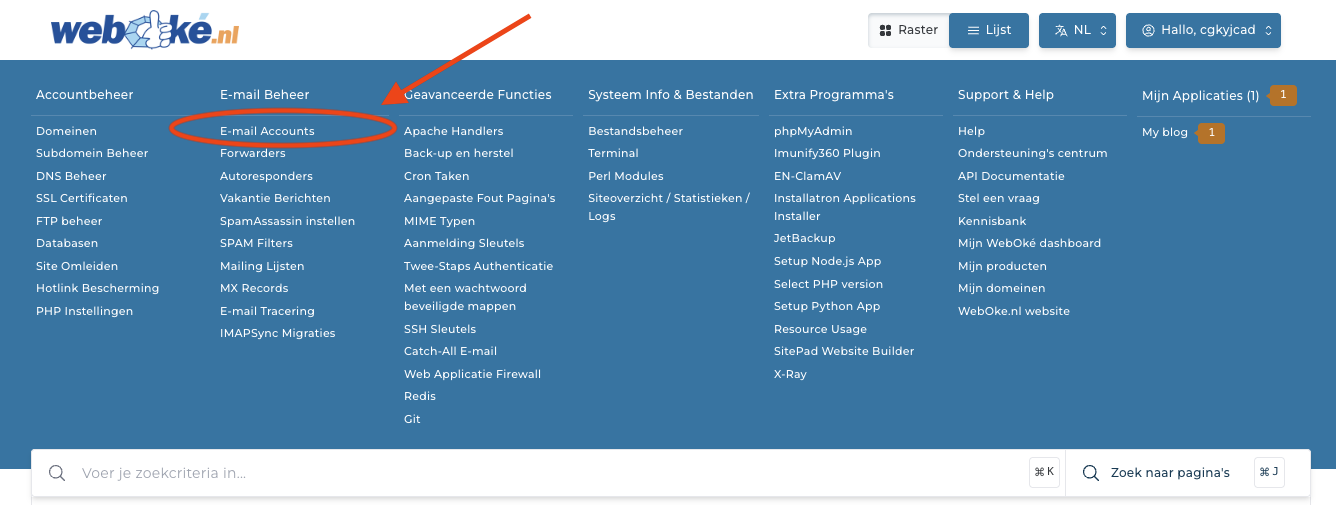
Step 3 - Click on 'E-mail Accounts'.
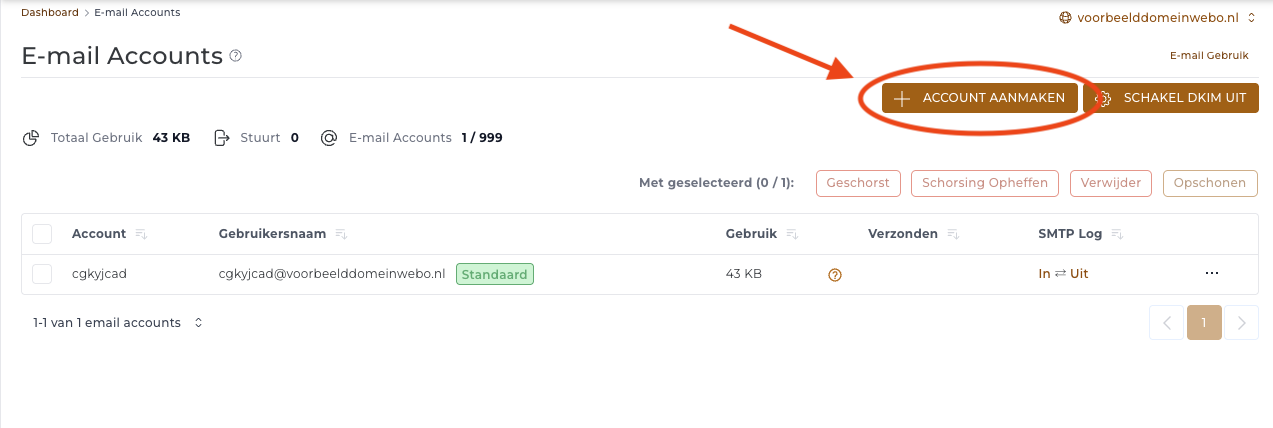
Step 4 - Click on 'Create Account'.
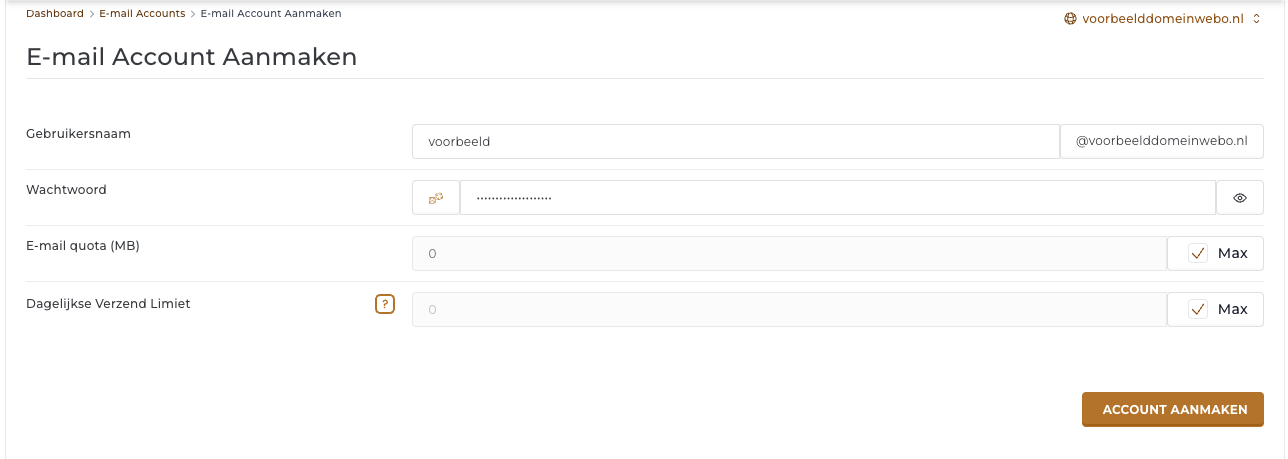
Step 5 - Fill in the following fields:
Username: this will become your email address. The domain name is already filled in, so you only need to enter the part before the '@'.
Password: with this password you can log into your email address in for example webmail, Outlook or Thunderbird.
E-mail quota: here you set how many MB the mailbox may use at maximum. We recommend choosing 'Max' here, then the general limit of the hosting package is applied.
Daily send limit: Here you set how many emails this mailbox may send per day. We recommend choosing 'Max' here, then the general limit of the hosting package is applied.
That's all! Your email address is now created and immediately active.
Note: did you create this email address in a recently ordered hosting package or domain? Then it may take a few hours before it works.
The newly created mailbox can be used in any mail client:
- Our own webmail at https://webmail.weboke.nl
- Outlook, read our instructions here
- Thunderbird (our favorite), read our instructions here
- Nextcloud Mail, read our instructions here
- Apple Mail (MacOS), read our instructions here
- Apple Mail (iPhone & iPad), read our instructions here