


It's possible to add additional users to your WebOké account, which can be useful when you want to give your web designer access to your account without sharing your own login credentials, for example.
This feature is also ideal for people who have multiple WebOké accounts and want to manage these accounts with one email address. You can do this by following the steps below from the accounts you want to manage. When you then log in with your email address, you'll be given the choice of which WebOké account you want to log into.
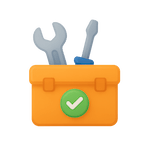
Step 1 - Go to My User Management
Step 2 - Here you can see all users who currently have access to your WebOké account. Click on 'Invite New User' to give a new user access.
The default user will always remain the owner of the account and can always remove any additional user, the owner cannot be removed.
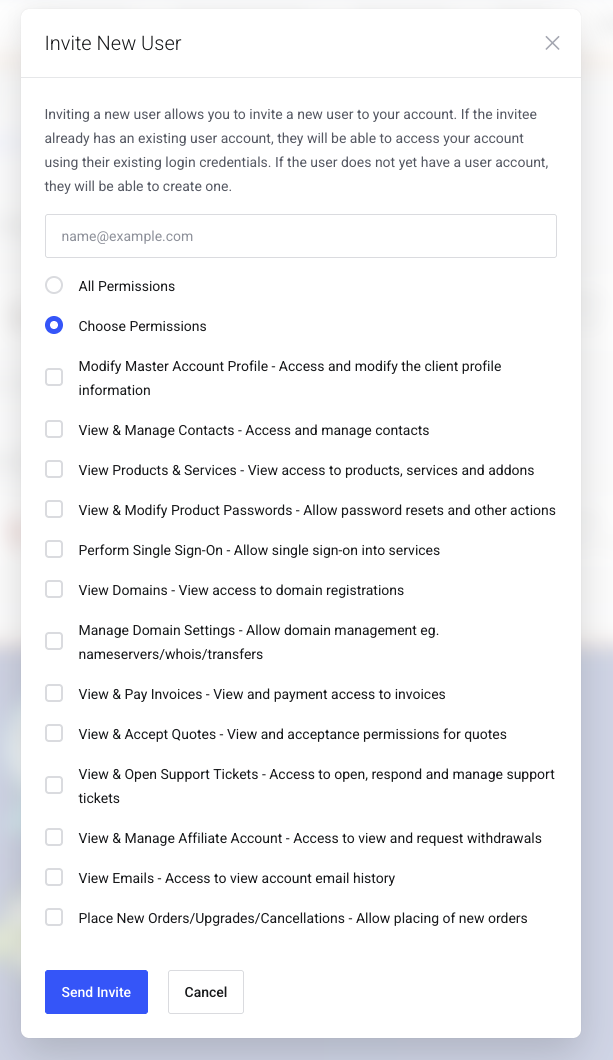
Step 3 - Choose which permissions the additional user should get in your WebOké account. You can choose to give all permissions, but you can also very specifically assign only a few permissions.
Then click on 'Send invite', an invitation will then be sent via email to the new user, where they can accept access to the WebOké account.
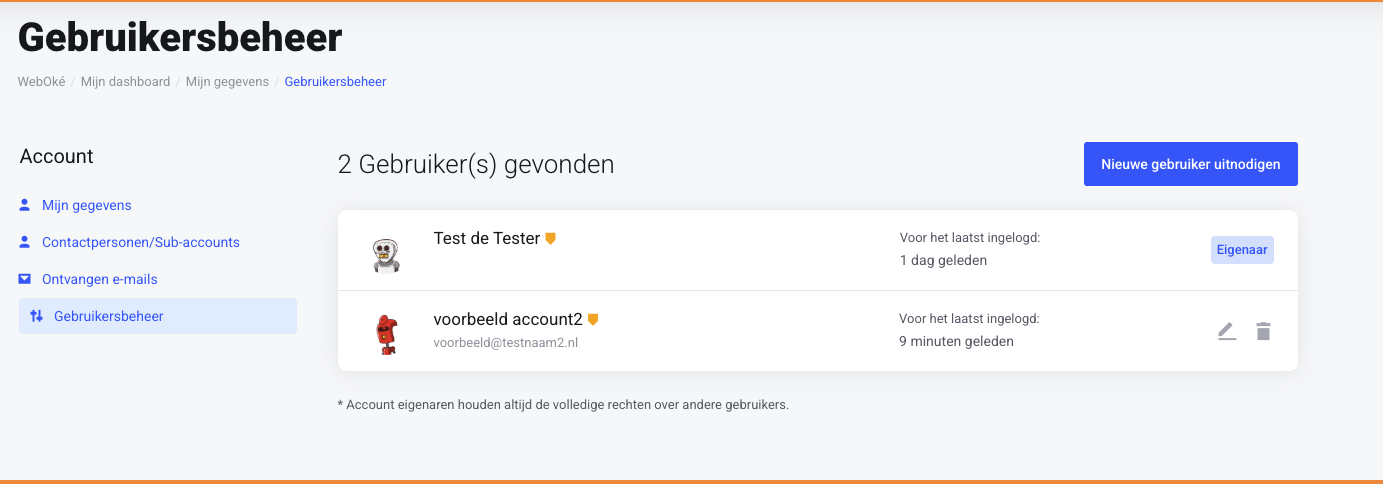
Step 4 - That's all. The additional user is now visible in My User Management, where you can always remove them or adjust the permissions.