


WebOké makes complete backups of all hosting packages every night.
These backups are securely stored in an external data center (in-house) and are always free for our customers to access. In this article, we explain how you can do this.
In this article, we cover the following topics in this order:
1. Opening JetBackup.
2. Restoring a full backup.
3. Restoring the backup of an email mailbox/email address.
4. Restoring the backup of specific folders or files.
Opening JetBackup:
Backups are managed in JetBackup, which can be found in the DirectAdmin control panel.
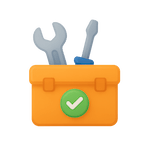
Below, we first explain how to access the DirectAdmin control panel via weboke.nl. If you normally log in directly to the DirectAdmin control panel, you can skip the following 2 steps.
- Go to the WebOké control panel.
2. Scroll down and click on one of the DirectAdmin 1-click login buttons.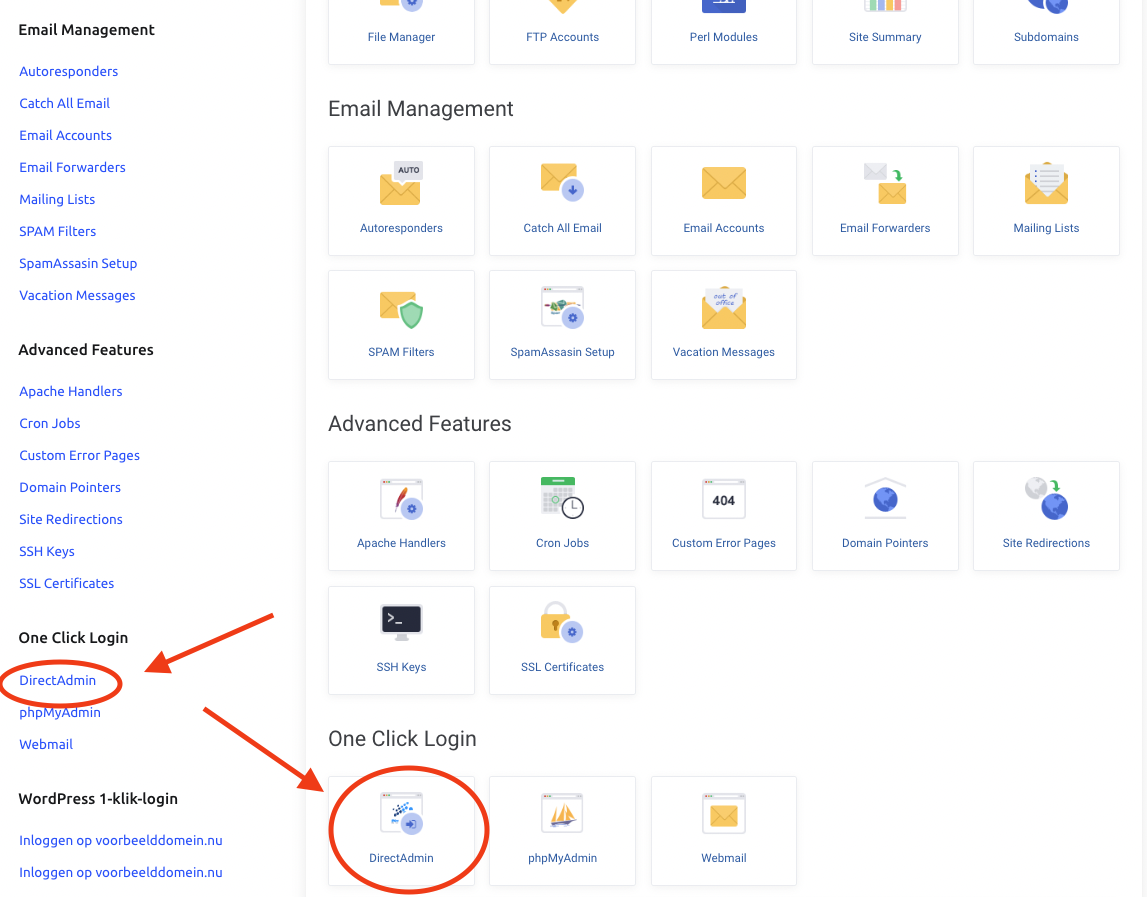
3. Now you are in the DirectAdmin control panel. Click on "Jetbackup" here.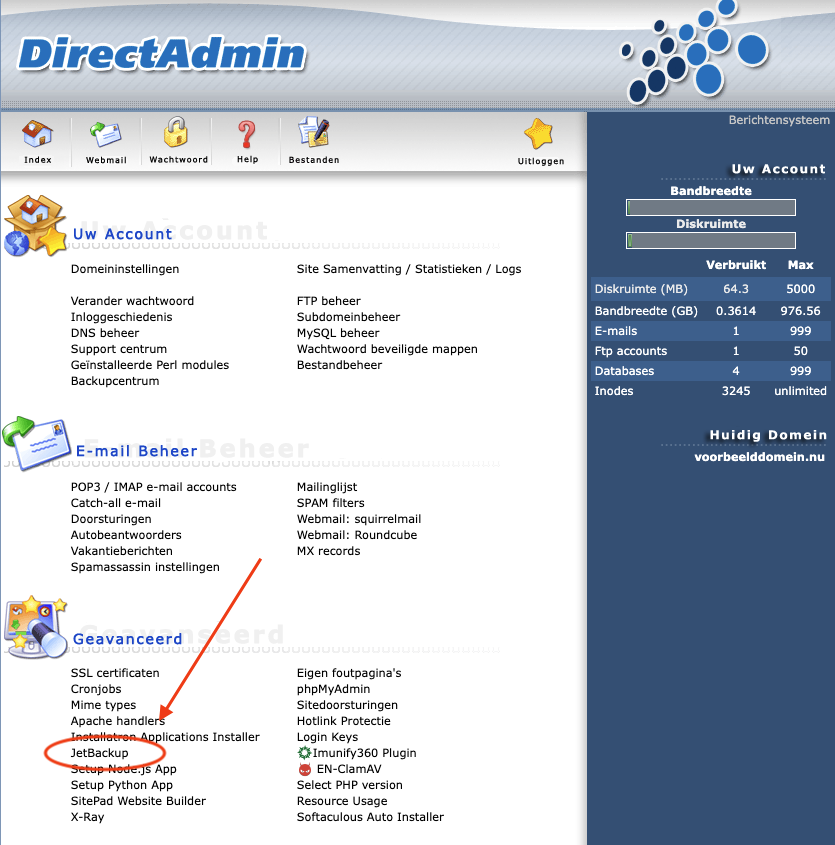
Restoring a full backup:
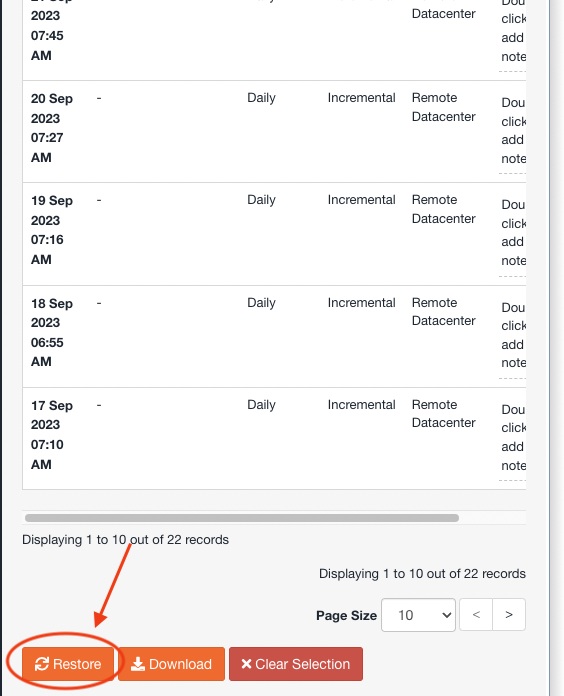
To restore a complete backup, choose "Full Backups" in this screen.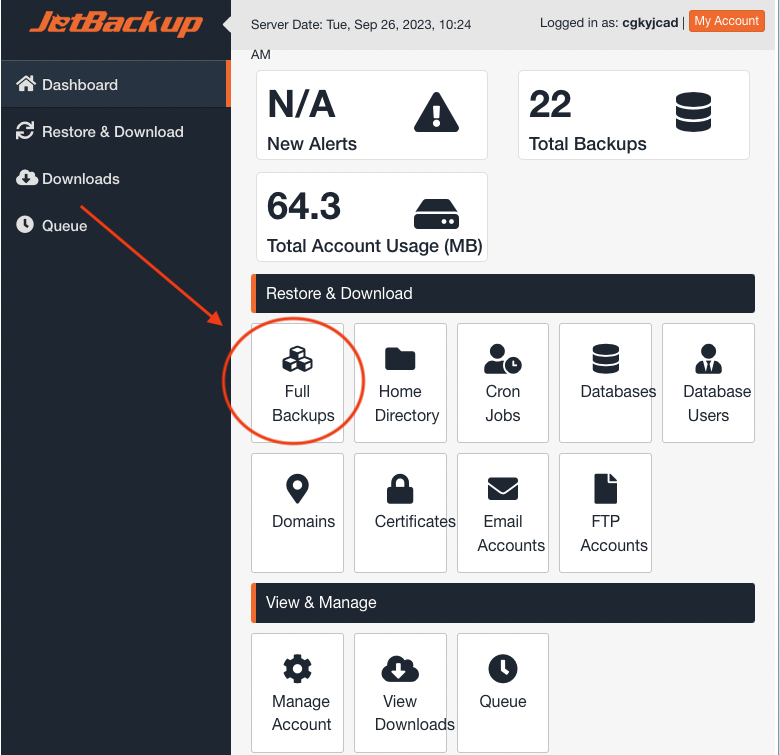
Select the backup you want to restore, click on the desired backup, and then click on "Restore."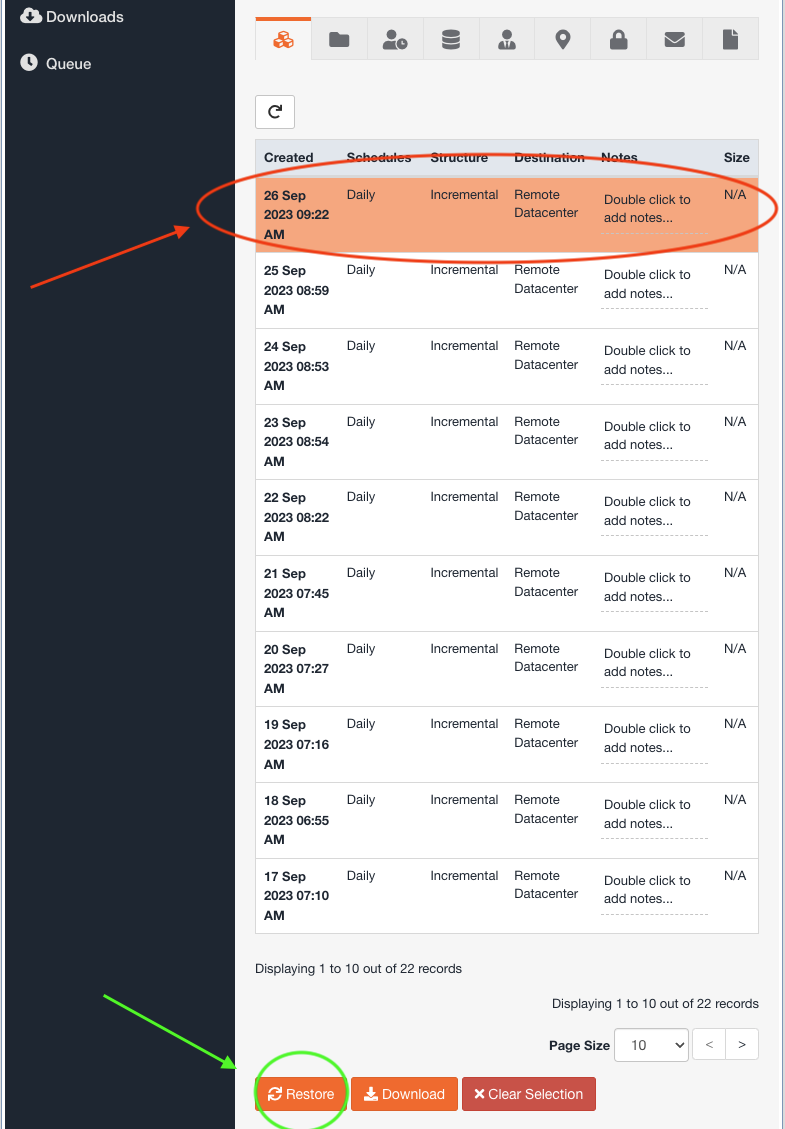
With a Full Backup, everything within the hosting account is restored. In this screen, you can exclude things you don't want to have restored. For example, if you don't want the databases to be restored, click on "Remove items" here.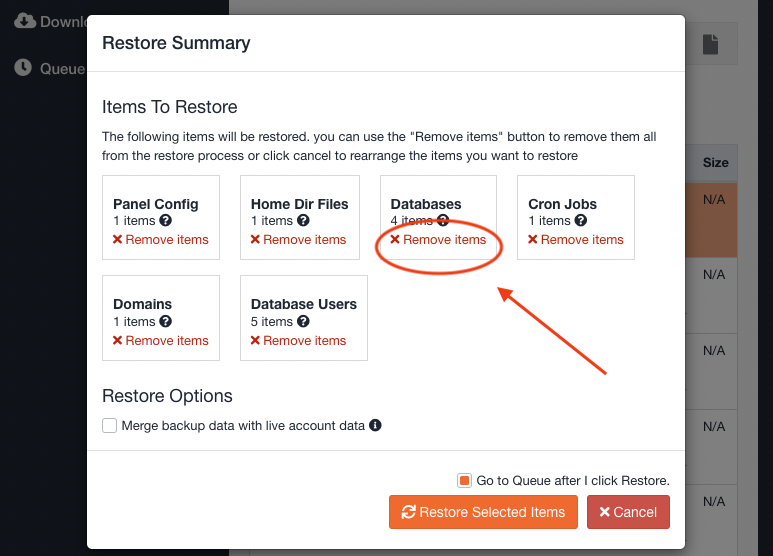
In the next screen, you can monitor the progress of the restoration. The duration depends on the number and size of files in your package.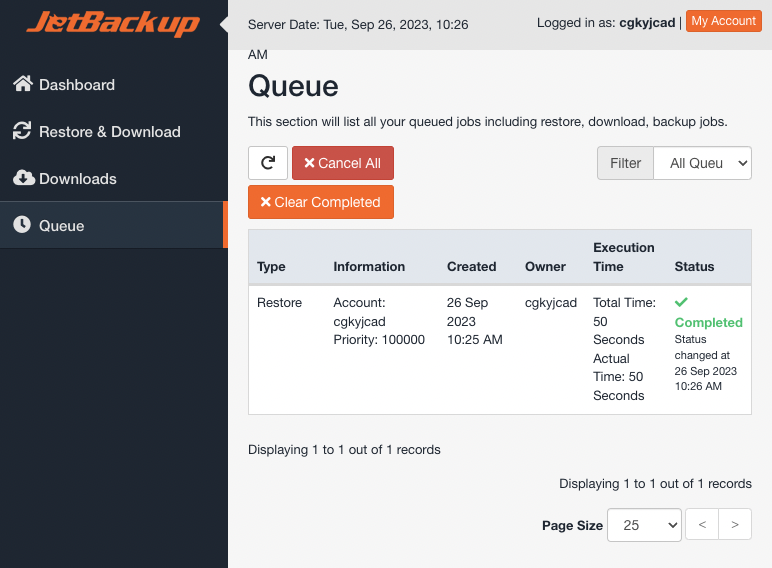
Restoring the backup of a specific mailbox/email address:
In the overview, click on "Email accounts."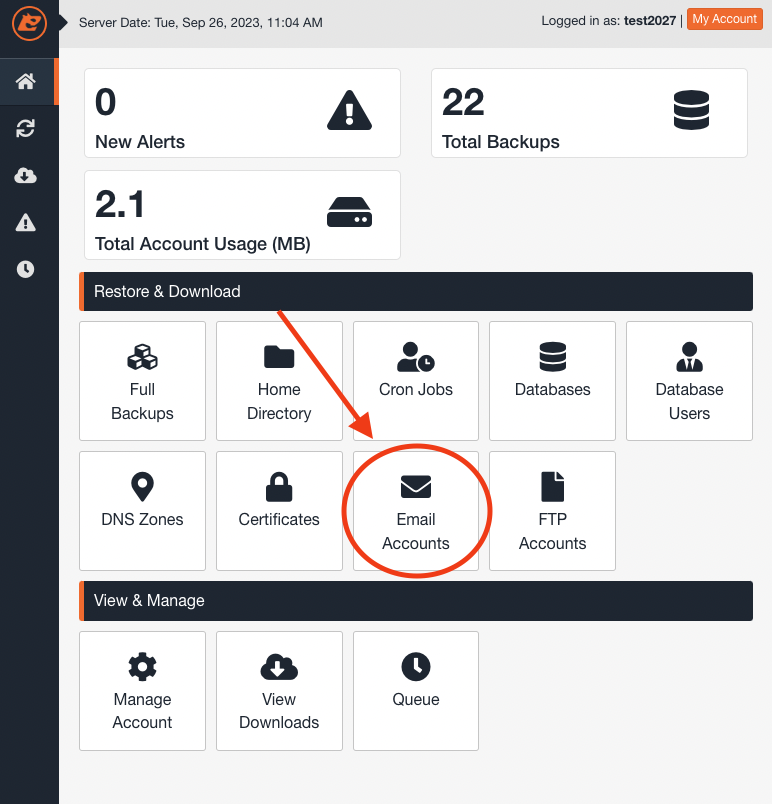
Here, you will find all email addresses in the account. By default, the most recent backup is selected. If you want to select the backup made on a different date, click on "Choose Other Backup." Then, click on the email address and then on "Restore." The backup will be restored immediately.
Restoring specific files or folders:
Click on "Home Directory."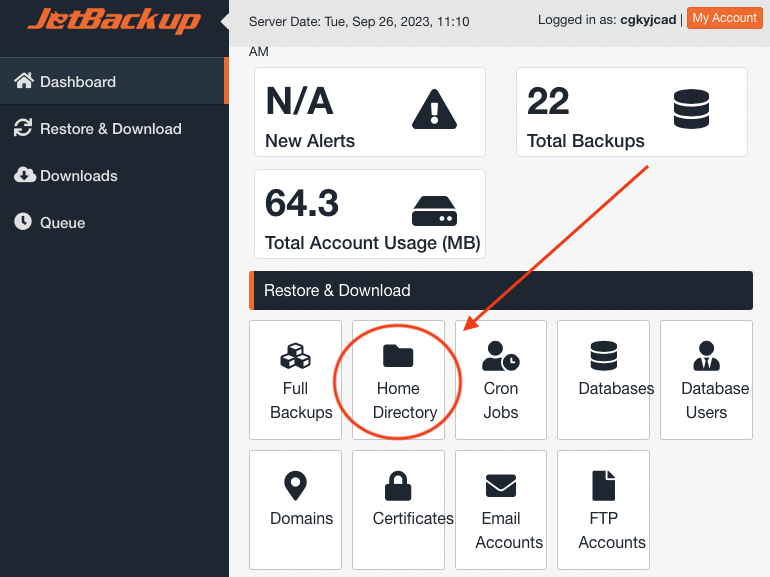
Choose the date from which you want to restore the backup and then click on "Change Files Selection."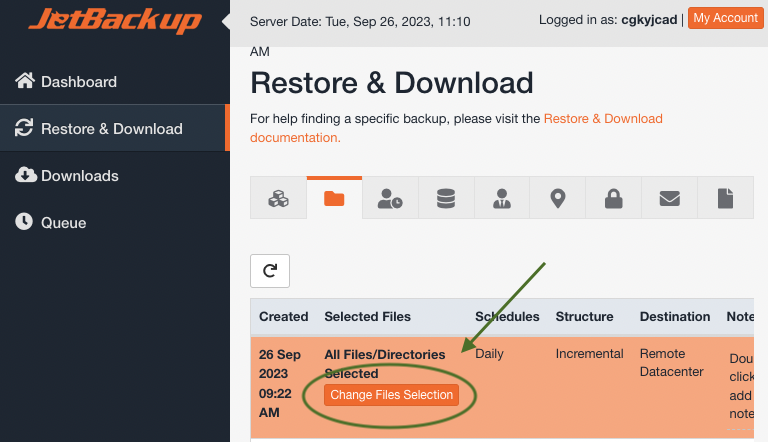
Here, you can browse through all your files, just like in the File Manager. If you don't see everything listed, you can go to the next page at the bottom of the screen or choose to show more lines in the current screen.
If you want to restore only the files of your website, click on 'Domains,' then on your domain name, and then check the public_html folder. If you have only one domain in your package, you can directly select the Domains folder in the first screen. After selecting the folder or file you want to restore, click on "Select Files."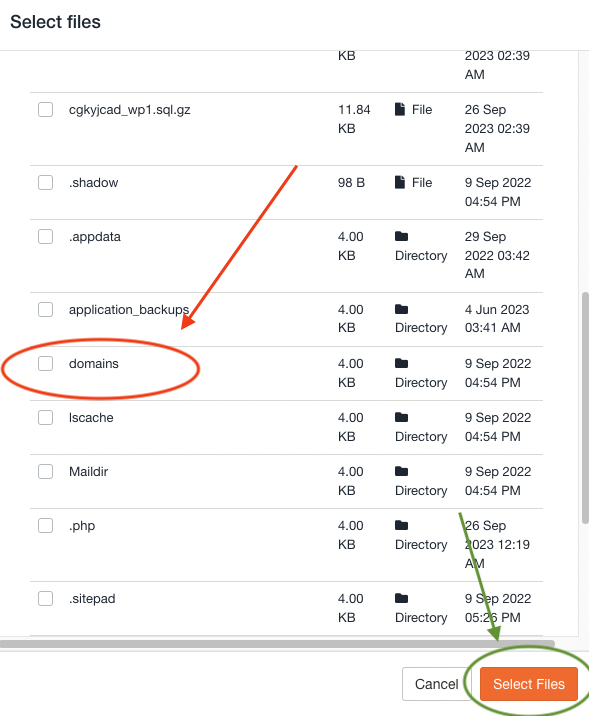
In the next screen, click on "Restore" to start the restoration of the backup.