


With the Nextcloud Files app you can synchronize all files on your Nextcloud server directly with your Mac, so you always have access to your files in Nextcloud from Finder.
When you drag files from Finder to or add them to the Nextcloud folder, these files are immediately uploaded to your Nextcloud server, pretty convenient right?
This can be set up in a few steps, which we'll explain below:
Step 1 - Go to https://nextcloud.com/install/#desktop-files
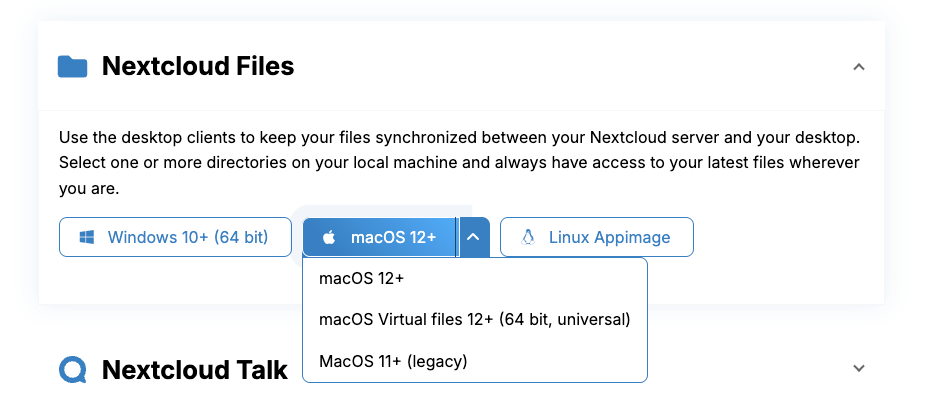
Step 2 - Click on the dropdown menu next to 'MacOS' under 'Download for desktop'. Here you can choose between MacOS and MacOS Virtual Files.
MacOS Virtual Files
With Virtual Files, only placeholders of your files and folders are stored on your Mac. Only when you click on a file is it downloaded from the server. This prevents that when you have, for example, 80GB of data in Nextcloud, it also takes up 80GB on your Mac.
MacOS (regular version)
The regular version stores a complete copy of all files locally on your Mac. The functionality is exactly the same. The advantage is that you also have access to your files without internet or when your Nextcloud server is unreachable. The disadvantage is that the disk space on your Mac can quickly fill up.
Step 3 - Go through the installation process, this works the same as installing other apps on Mac.
Step 4 - Open the Nextcloud App and click on 'Log in'

Step 5 - Enter the URL of your Nextcloud server and click on 'Next'.

Step 6 - Your browser will then automatically open and you click 'Log in' in this window.
If you are already logged into Nextcloud, you will go directly to the next screen, otherwise you will need to enter your username and password first.

Step 7 - In this screen, click on 'Grant access'

Step 8 - Done! Your Mac and your Nextcloud server are now synchronizing all files and folders associated with your account. If you go to Finder, you will now see a folder named 'Nextcloud' under 'Locations'.
In this case we are using Virtual Files, as soon as we click on a file here it is downloaded directly from Nextcloud and opened immediately on the Mac. If you place a file in the Nextcloud folder, it is automatically uploaded directly to the Nextcloud server.
If you want to be able to open certain folders even when you have no internet or the Nextcloud server is offline, you can click on the cloud icon next to the folder name, then it will be downloaded.

In the top right corner of your Mac's status bar you will now see the Nextcloud logo. If you click on it, the app will open and you can view your activity and manage the (synchronization) settings.