
WebOke Backups: viewing, restoring, or downloading a backup
WebOke Backups is our own backup system. Every night we make a complete backup of your hosting package: your files, databases, mailboxes and settings. We store those backups encrypted on separate storage servers in a separate datacenter, in our own management, so separate from the server your website runs on. You can restore something yourself, for free and without our involvement, from the backups of the past 30 days.
In this article:
- What's in the backup?
- Opening WebOke Backups
- The wizard in six steps
- The four ways of restoring
- Downloading and uploading
- Previous restores
- Frequently asked questions
What's in the backup?
For each hosting package, we keep per night:
- all files in your home folder, including your websites;
- your databases, including the database users with their passwords and permissions;
- your mailboxes and mail settings (aliases, filters, autoresponders);
- the DirectAdmin configuration: domains, subdomains and redirects;
- DNS zones, SSL certificates, cronjobs, FTP accounts and your PHP version.
For a mail package, we keep the mailboxes and the DirectAdmin settings.
Opening WebOke Backups
- Log in to mijn.weboke.nl.
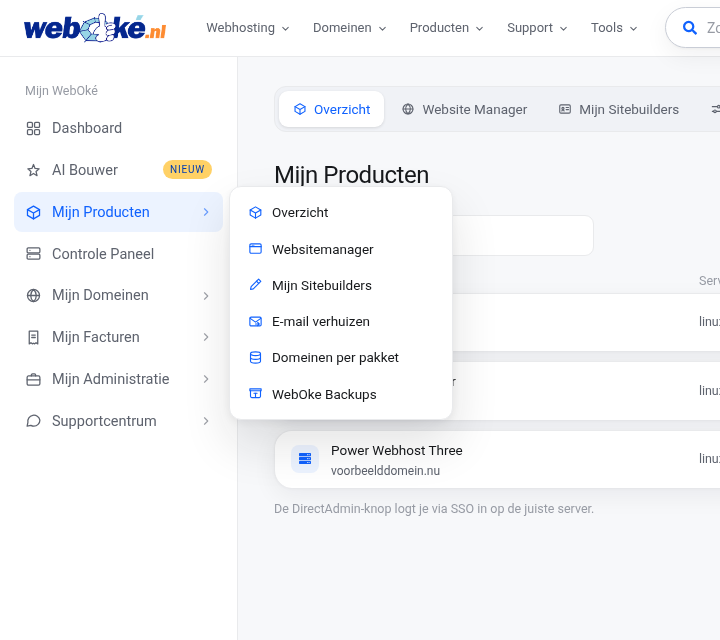
- In the menu on the left, go to Mijn Producten and choose WebOke Backups in the submenu.
- You can also go directly to mijn.weboke.nl/backups.
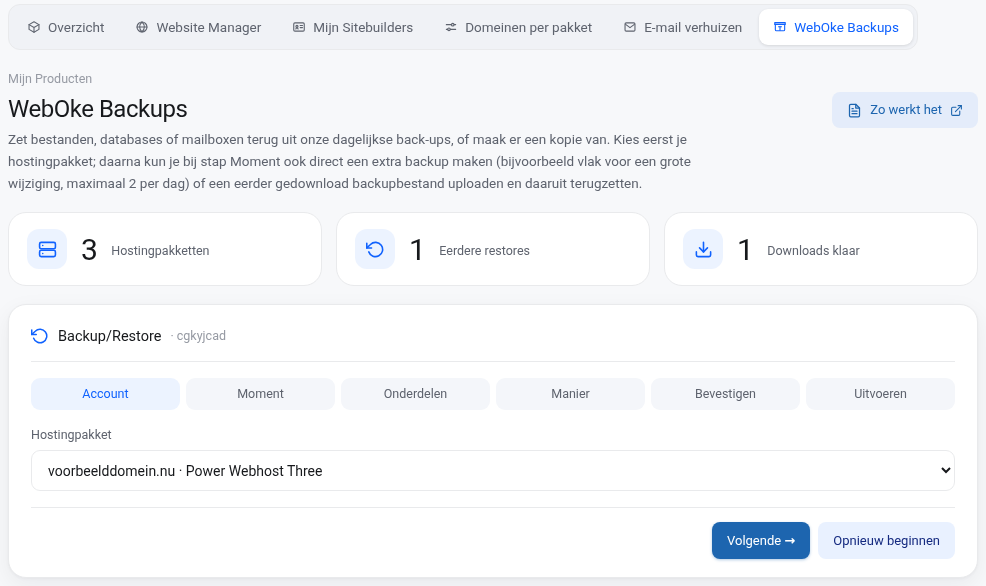
At the top of the page you'll see three tiles: the number of hosting packages, the number of previous restores and the number of downloads ready. The Zo werkt het button opens this article. Below that is the wizard you use to restore, followed by your previous restores, your downloads and uploads, and a brief explanation of the ways of restoring.
The wizard in six steps
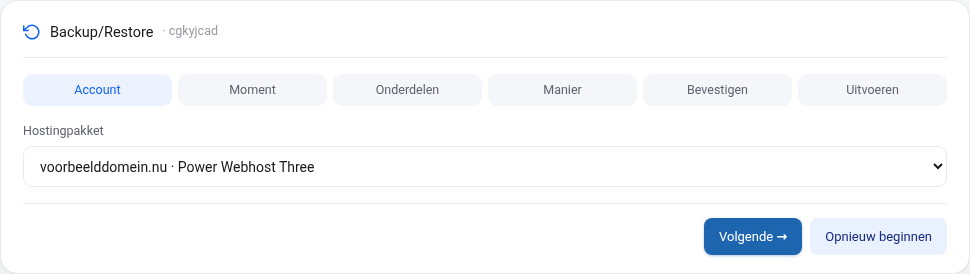
The wizard guides you through six steps. Use Volgende and Vorige to move through the steps, and Opnieuw beginnen to start over.
Step 1: Account
Choose the hosting package you want to restore something from. If you have a lot of packages, there's a search field above the list. If you have a reseller package, you then choose which account it concerns: your own account or one of the accounts you've created.
Step 2: Moment
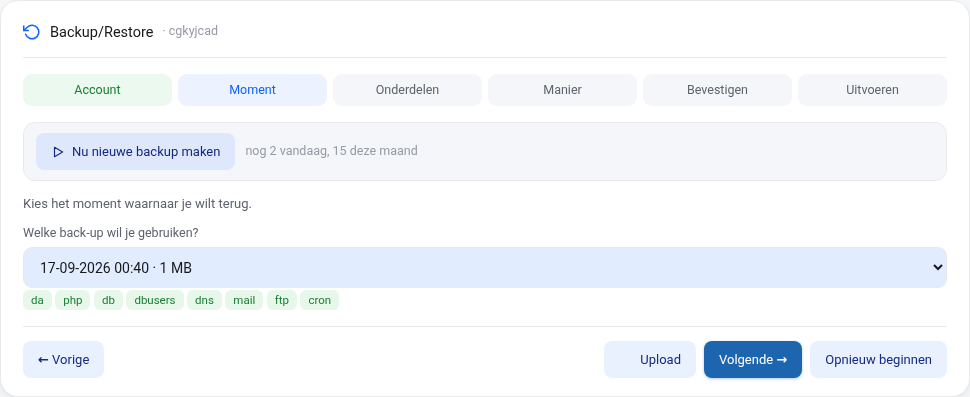
You'll see all available backup moments with date, time and size. By default, the newest one is selected. Choose the moment you want to go back to. Below the selection list you can see which components are included in that moment.
At this step you can also do two other things:
- Nu nieuwe backup maken: create an extra backup of your account right away, for example just before a major change to your website. This is possible up to 2 times a day and 15 times a month. As soon as the backup is ready, the new moment appears in the list. Per day we ultimately keep the last backup of that day, so an extra backup is mainly a restore point for that same day.
- Upload (the button at the bottom): restore from a backup file (.tar.gz) that you previously downloaded via this screen. The file is automatically deleted again after 48 hours.
Step 3: Onderdelen
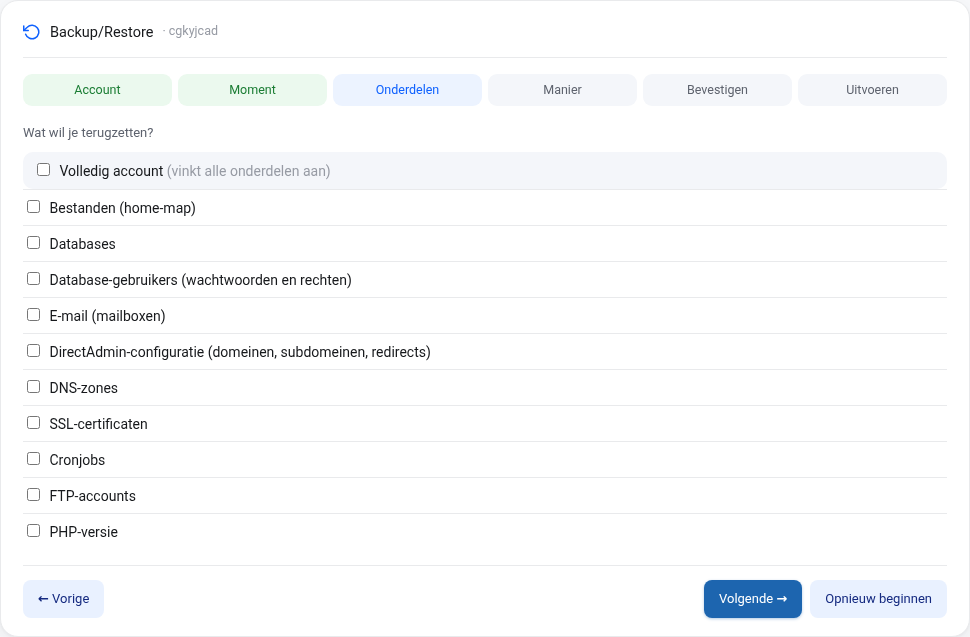
Check what you want to restore. You can choose one or more components:
- Bestanden (home-map): the complete home folder, or only specific folders and files. If you choose the latter, you browse through the backup as in Bestandsbeheer, or search by name (minimum 3 characters) and check what you need.
- Databases and Database-gebruikers (passwords and permissions).
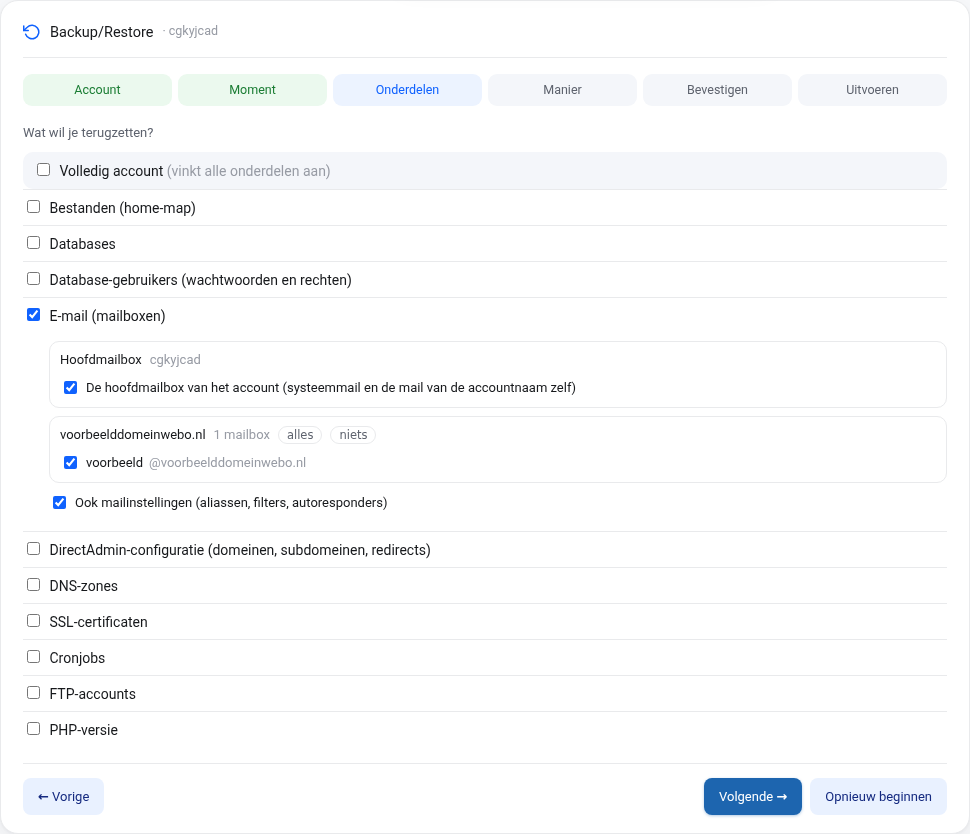
- E-mail (mailboxen): the account's main mailbox and, per domain, all or individual mailboxes, optionally also the mail settings.
- DirectAdmin-configuratie, DNS-zones, SSL-certificaten, Cronjobs, FTP-accounts and PHP-versie.
With Volledig account you check everything at once. For a mail package, you can only choose mailboxes and the DirectAdmin settings.
Step 4: Manier
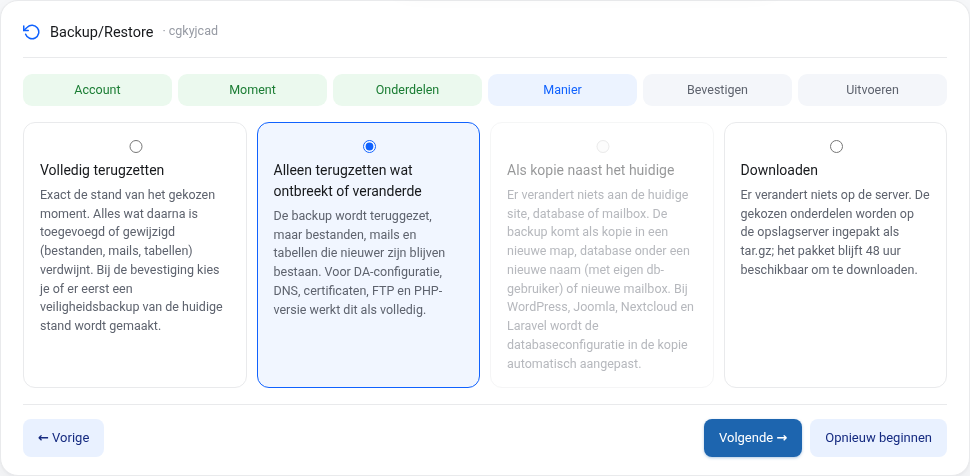
Choose how you want to restore. The four ways are explained further on in this article.
Step 5: Bevestigen
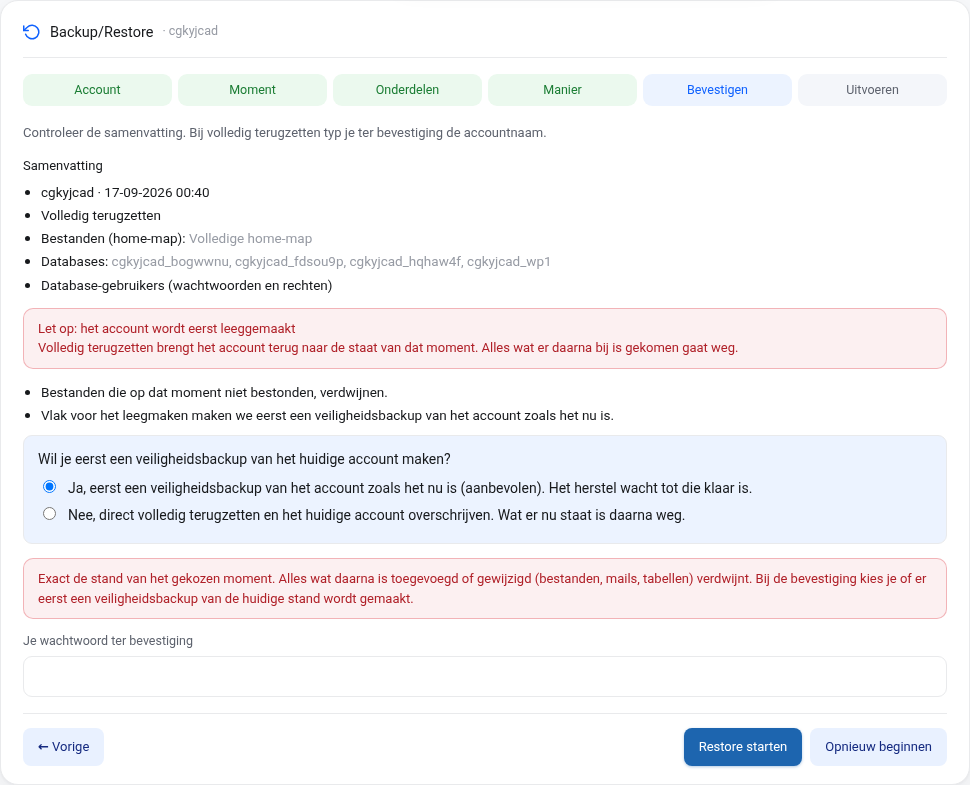
You'll see a summary of your choices. If you choose full restore, you'll first see what will be lost when the account is emptied and what will be recreated. You choose whether we make a safety backup of the current state beforehand (recommended, on by default) and enter your password as confirmation. Then click Restore starten. For a full restore, we'll ask you once more afterwards to confirm you're sure.
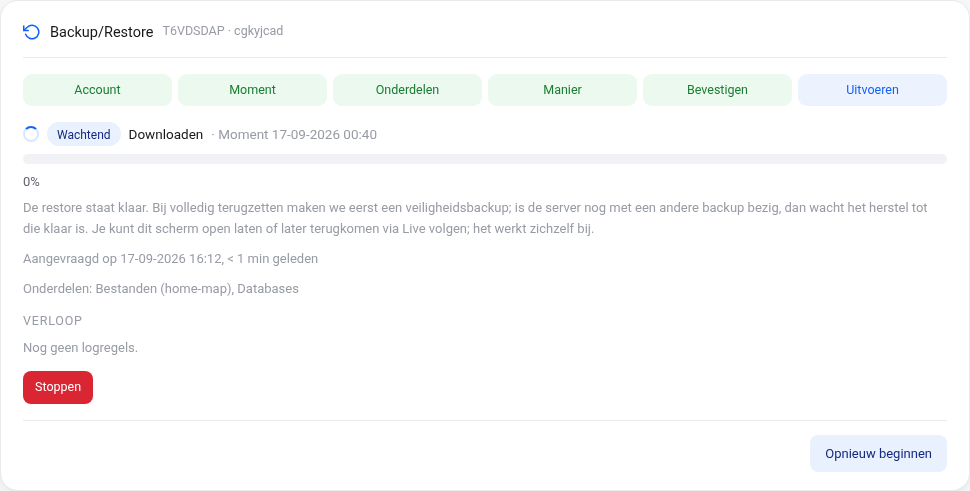
Step 6: Uitvoeren
The restore is placed in the queue and usually starts within a minute. If a backup is running on the server at that moment, the restore waits until it's finished; for a full restore, we first wait for the safety backup. You'll see step by step what's happening, the screen updates itself. You can safely close the page: at the top of the WebOke Backups page the notice Er loopt een herstel remains visible with the Live volgen button, and once the restore is finished, or if it fails, you'll get an email. You can cancel a running restore with Stoppen, and start a failed restore again with Opnieuw proberen. As long as a restore is running, you can't start a new restore for that account.
The four ways of restoring
- Volledig terugzetten: exactly the state of the chosen moment. The account is first emptied and then restored; everything added or changed after the chosen moment (files, mail, tables) is lost. During confirmation you choose whether we first make a safety backup of the current state, so you can always go back. This option is on by default.
- Alleen terugzetten wat ontbreekt of veranderde: the backup is restored, but files, mail and tables that are newer than the backup remain in place. Handy if you accidentally deleted something. For the DirectAdmin configuration, DNS, certificates, FTP and the PHP version, this works the same as a full restore.
- Als kopie naast het huidige: nothing changes to your current website, database or mailbox. The backup is added as a copy in a new folder, as a database under a new name (with its own database user) or as a new mailbox. This way you can calmly check what was in the backup. For WordPress, Joomla, Nextcloud and Laravel, we automatically adjust the copy's configuration file to the new database. If you want to view the copy under a different URL, enter it. The new database details are shown only once, so save them right away.
- Downloaden: nothing changes on the server. The chosen components are packaged as a tar.gz file that you can download for 48 hours. You can receive an email as soon as the package is ready.
Downloading and uploading
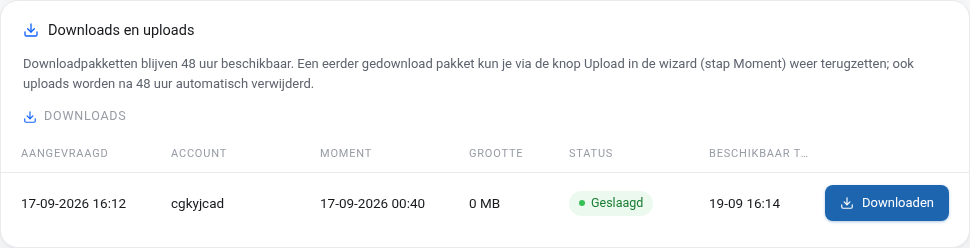
Below the wizard is the Downloads en uploads overview. A download package remains available for 48 hours, and the download link only works while you're logged in. A previously downloaded package can be restored again later: in the Moment step, choose Upload, select the file and go through the remaining steps. Uploads are also automatically deleted after 48 hours.
Previous restores
Every restore appears in the Eerdere restores list with the date, an eight-character restore code, the account, the moment, the method, the components and the status. Use Resultaat to open the report, which shows, for example, how many files were restored and to which folder. If a restore is still running, it says Live volgen. Mention the restore code if you have a question for us about a restore.

Frequently asked questions
How long are backups kept?
There's a backup for every night of the past 30 days.
Will I lose what changed after the backup?
With a full restore, yes. Not sure? Then choose Alleen terugzetten wat ontbreekt of veranderde or a copy. For a full restore, leave the safety backup switched on, so we can always retrieve the state from just before the restore.
How long does a restore take?
That depends on the amount of files and mail. A single folder or database is usually restored within a minute, a complete account with a lot of mail can take longer. You don't have to wait: you'll get an email as soon as it's done.
I don't see WebOke Backups in my menu.
WebOke Backups is enabled for every hosting and mail package. If you don't see the item, your account has no active package, or you are logged in as a sub-user without access to products. Log in with the main account or create a ticket.
Can't figure it out?
Create a ticket via the Supportcentrum, and we'll help you further.
